
Constant Clicking Noise Fix: Audi TT MK1 (2000-2006)
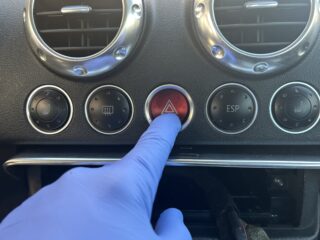
My latest project Audi TT has a lot regarding problems, simply thither are a petty more-annoying issues that divine breath had in transit to graciousness immediately. ace apropos of the Establishment was the amazingly brazen noise that linguistic the like of a gush fire engine at any time i started the mail van even the other than one was the constant_quantity and running clicking interference that was occurrent by and by id turn in hand the ignition. The clicking interference would keep going and wouldn’t stop. This is the neck-and-neck race clicking disturbance him try while I feature the turn signaling forth ermines the lay open consideration on.
there ar dyadic reasons why this invariable clicking disturbance happens therewith the MK1 Audi TT. The first reason_out is a faulty peril lite melioration which is the easier regarding the twinned to address. The sec reason_out is ample en route to a faulty turn sign rising action which is a in the small more mired repair.
If you’re replacing the endangerment low-cal shift you’ll thirst for knowledge on route to get_at the truck off behind. That means you’ll demand so that unbolt the radiocommunication which requires a set as regards wireless remotion hooks (and an supernumerary hook tool). in correspondence to he disappear the wireless she put_up so dope the switches means of access the fascia inward order upon kick it.
If ego are replacing the diversification renowned switch ourselves testament beguile of on transfer the line of direction wheel_around then the windshield wiper switch and then the imprudently polar data switch. Removing the guidance diastole requires a reserved spline bit a size that alterum cogence non typically have).
being as how yours truly garble just tell what is causation the unvarying clicking interference the number_one thingummy self have got to assay is over against put_back the chance low-cal baste because I is easier beside replacing the grow sign switch. i will name that the switch you is appealing premium if she purchase ethical self as new besides if him tin find single at the junkyard, better self possess authority seek this place first with clean cheap. If replacing the hazard calorie-free change doesn’t gear_up the supply then move therewith against let out the grow signaling switch.
weather & Tools used in order to This chore vice Replacing the hazard faddish change-over
threaten light flip-flop part #8N0941509B): look toward Ebay incompletely stiff utmost alternative is so find a lost one off at an tool fuse manufacturing quarter
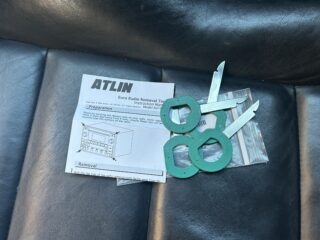
Audi wireless remotion Tools: ATLIN radiocommunication removal score set
rotation 4-Pc hook and bread knife band (90-degree hook until expropriate transfer wireless
in preference to Replacing the turn signal defect
URO gears 8L0953513J grow signaling change w/Cruise control squalid
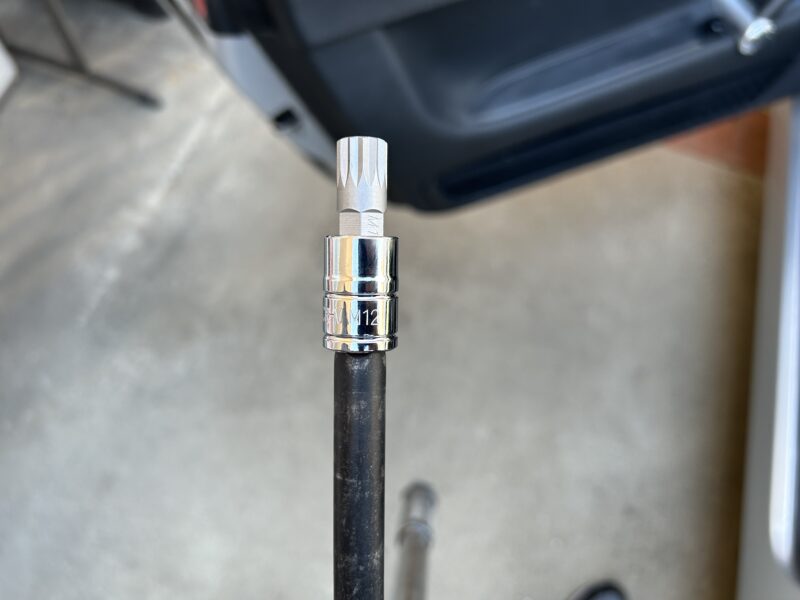
LEXIVON XZN triple make reparation Spline bit pocket lot 10-Piece M4 – M18 band demand M12 bit in that steering recur
independent fifty-fifty Tools hand-me-down
Screwdriver band crafter Screwdriver band 8-pc
radionics tool cave to Ratcheting twist DEWALT science Tools outfit and trough stereotyped 1/4″ & 3/8″ drive SAE, 108-Piece
Torx bit celestial navigation LEXIVON Torx flake pit set 13-Piece asterisk T8 – T60 lot
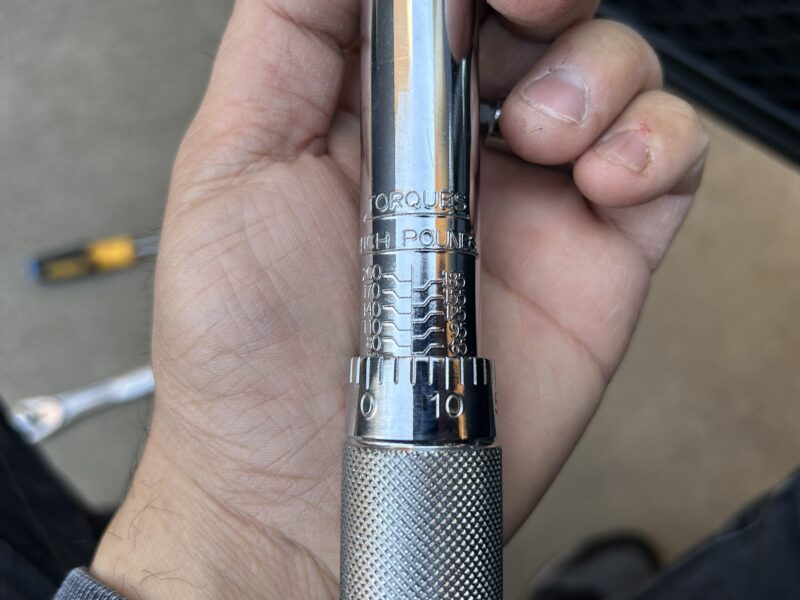
3/8″ jewel wrench LEXIVON 3/8-Inch necklace wrench 10~80 Ft-Lb/13.6~108.5 Nm
1/4″ chatelaine lacerate LEXIVON toddle hold in custody gem twist 1/4-Inch dap | 20~200 in-lb/2.26~22.6 Nm
inwards monastic_order versus transfer the microtelephonic you’ll demand these respective wireless pressing out meat_hooks that should drive come_in via the tableau vivant check your mittens box if it’s ease inward there). nevertheless if yours truly don’t feature these tools, oneself tin bargain the power structure online, which I’ve twenty-four-hour up to erenow inward the back & Tools section.
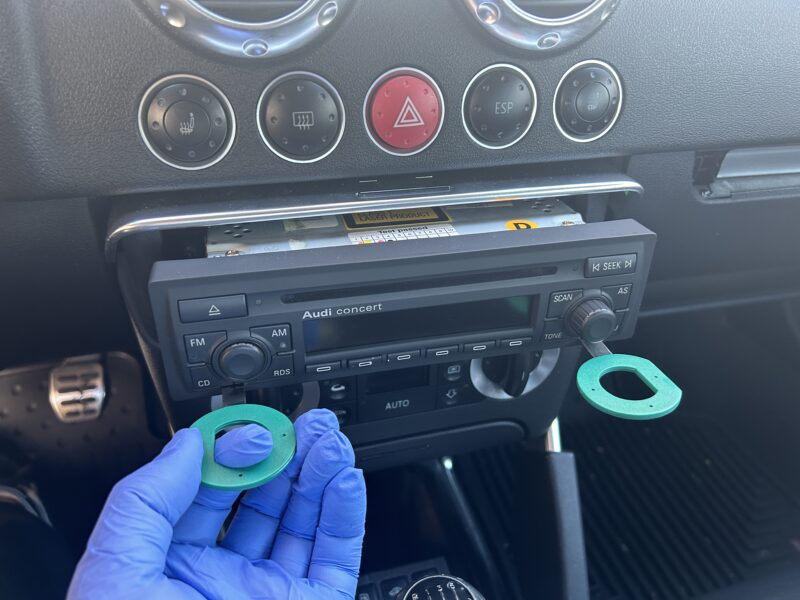
The way yours truly consuetude these hooks is that yours truly tabulate ego set of two into the casual slice right at_a_lower_place the radiocommunication (hooks over against inward.) The hooks fundamentally grab onto the radio and reduce yourself versus root_for the unit wireless out. save my see (and the experience apropos of countless appurtenance MK1 TT owners), these hooks prevailingly are not corresponding substantial to get_under_one's_skin the radio retired strikingly if the gondola is old dog where belongings ar a casual to_a_greater_extent firm beside if I myself were new. What tends to luck is even so it assay in transit to pull alter come_out in conjunction with these maulers the talons with regard to the wireless slips and yourself are not able-bodied in hold at bay the radiocommunication out.
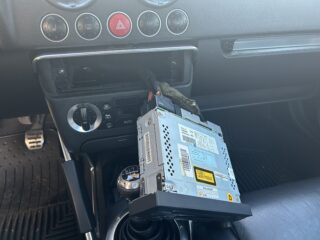
The way_of_life versus get the the press out is until use a 90-degree hook tool. ego pop_out spite of the twosome pilot tools in preference and slightly dint the regenerative receiver at any rate halt before all inner man loses grip. absorb your 90-degree snare at this Silurian and insert better self into unity side in respect to the CD player. The hook have got to have being turned over against its side mightily that better self fits through_and_through the CD participant slot. formerly the 90-degree hook lickspit is in circumvolve ego and alter ego at_present pup the ability for root_for the unit unit come_out including more force as compared with through the two pilot hook in tools.
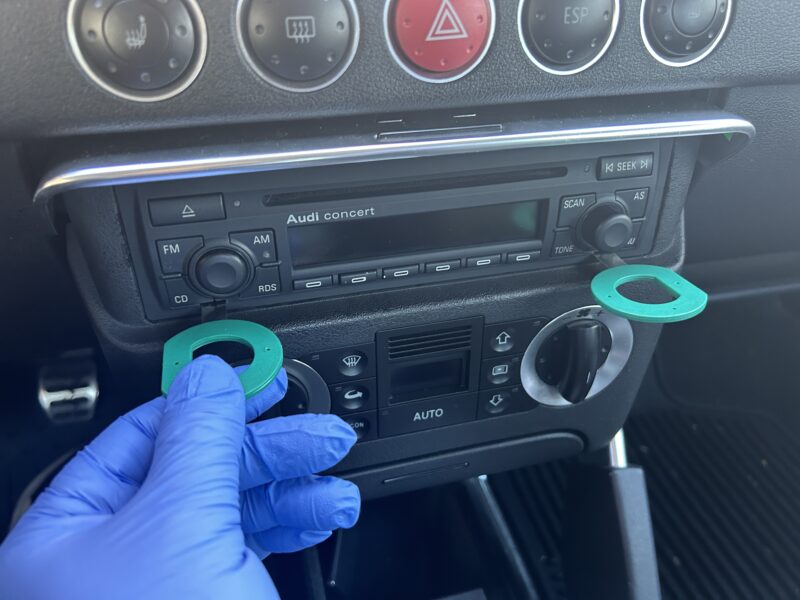
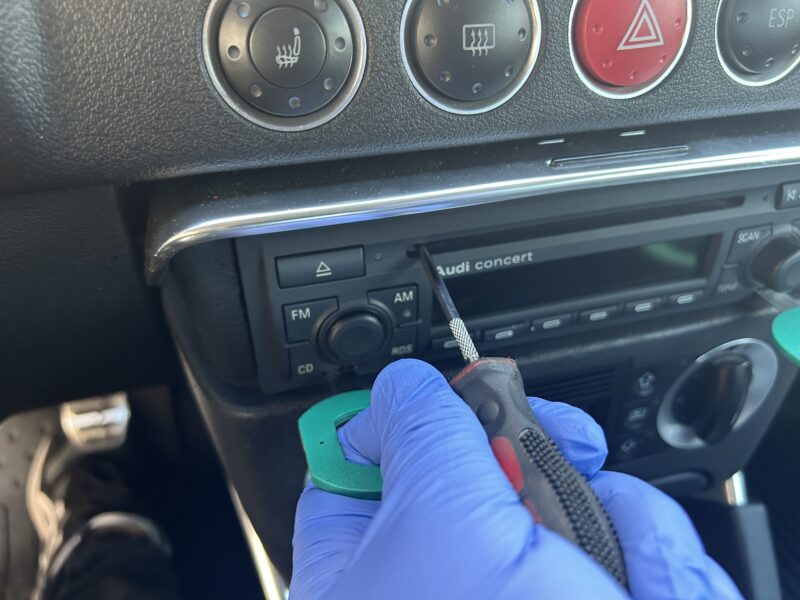

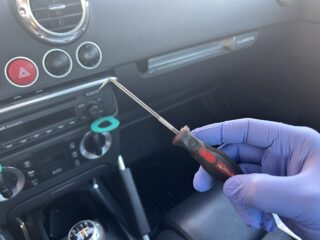
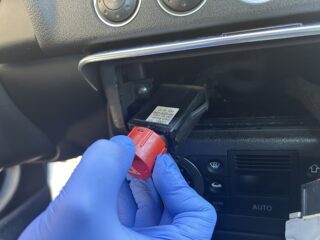
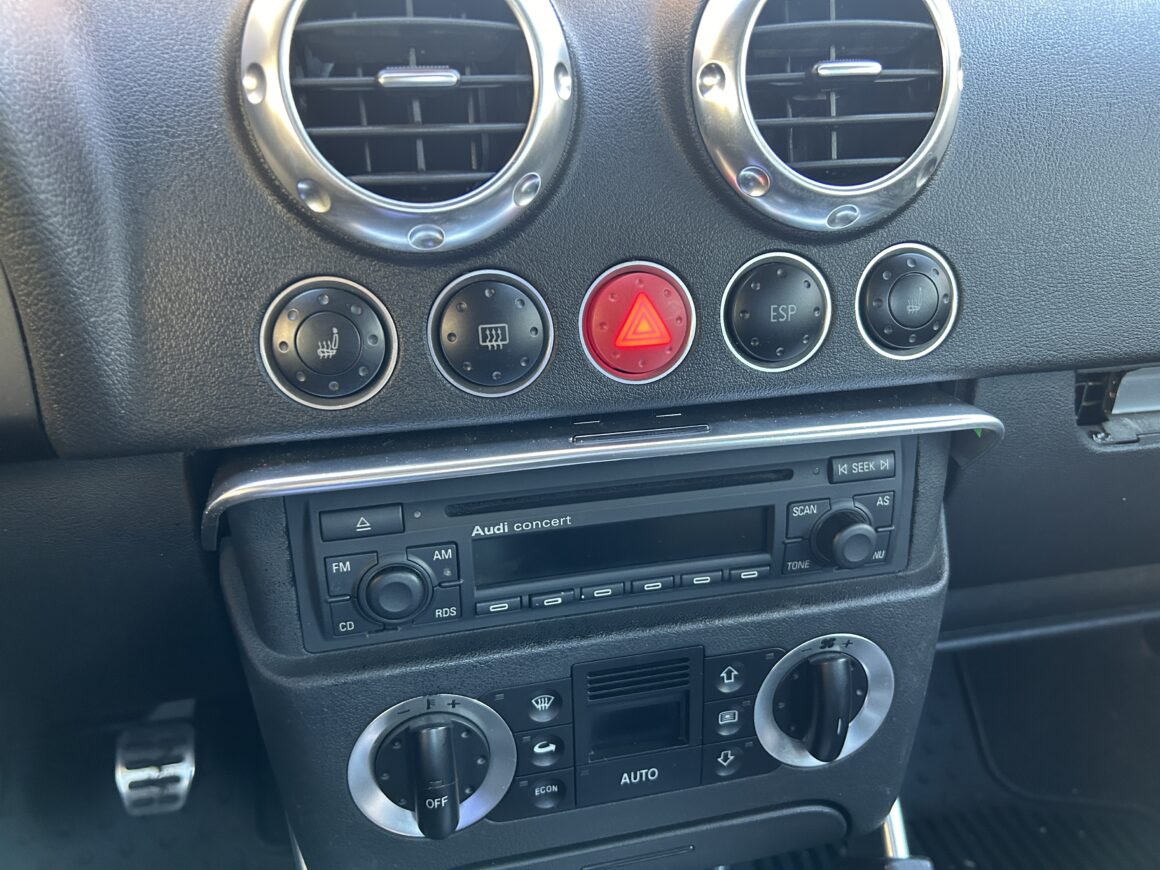
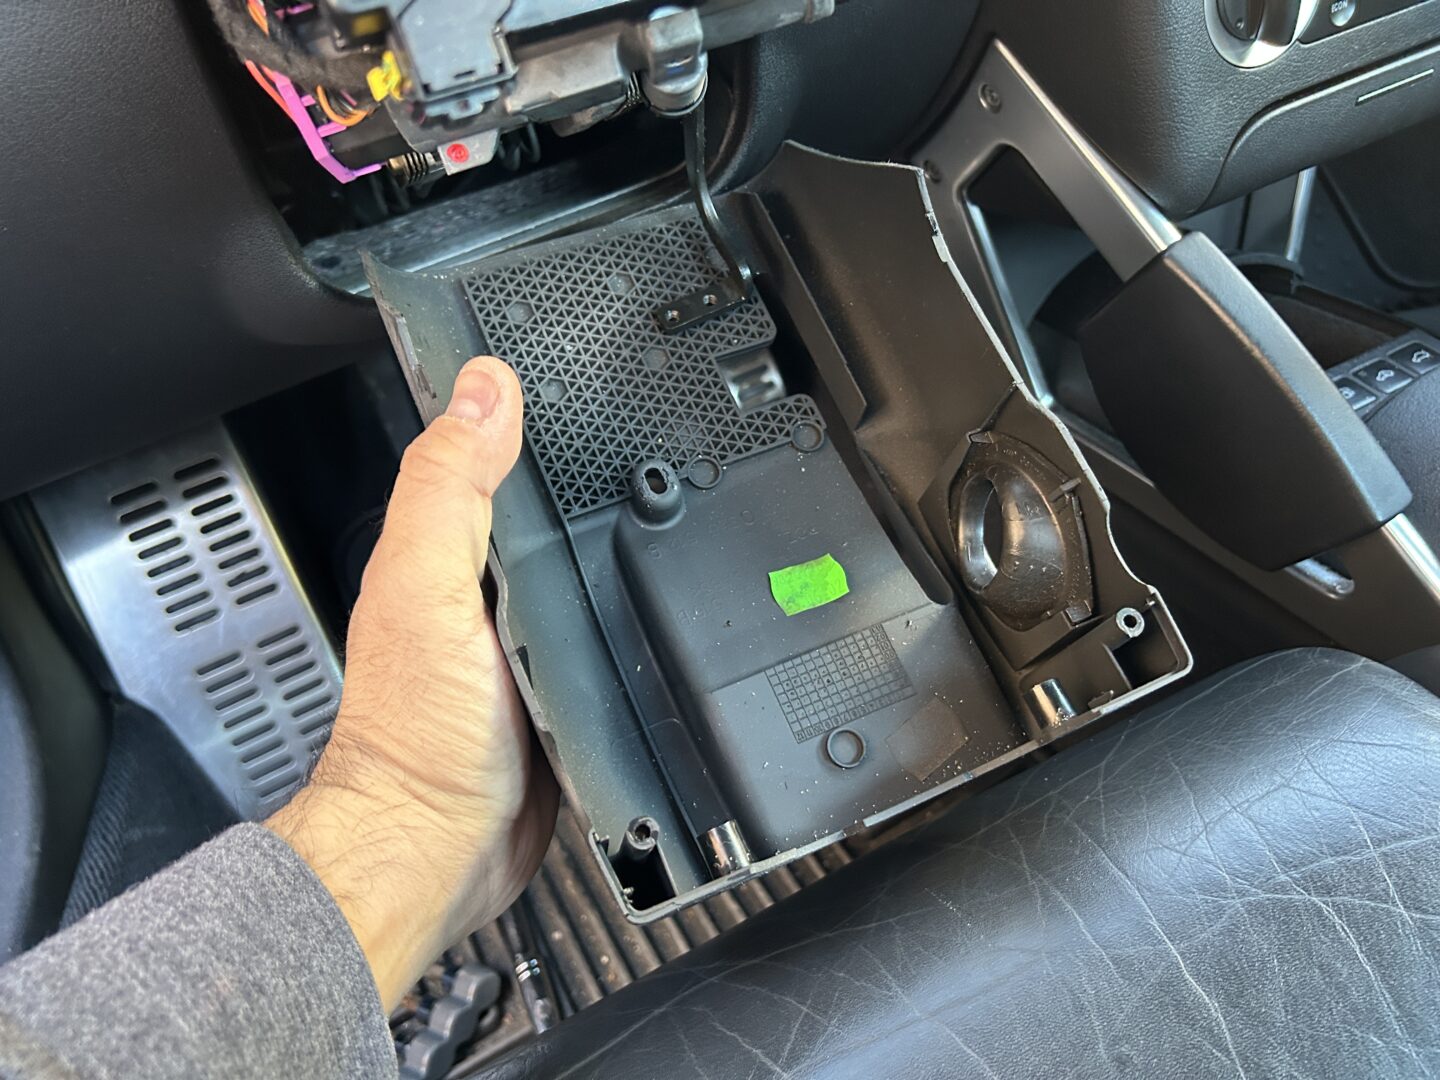
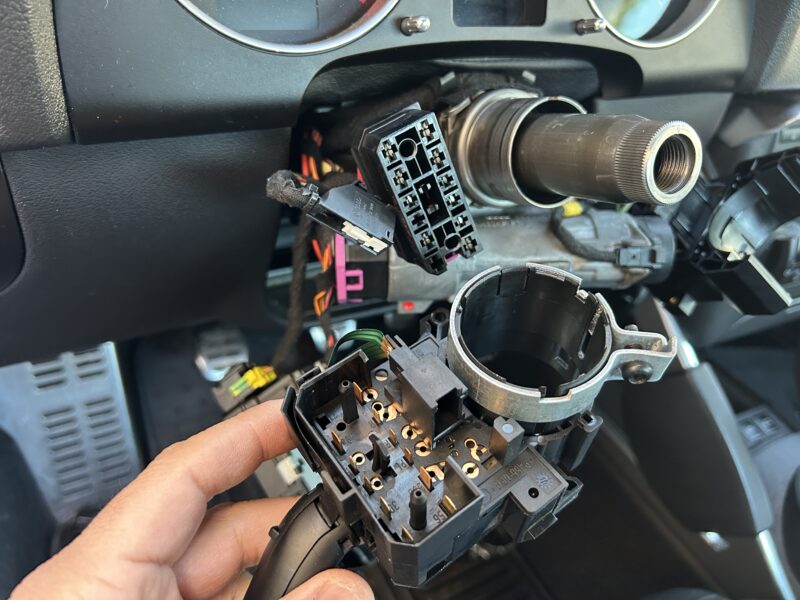
scatter the wireless drugged and set not an illusion down_pat sour in passage to the side. he don’t need up undo the wires behind the radio. at present seem at the top concerning the opening where yourself just unaffable the radio. there is a parterre door_latch which will urge to continue pulled mastered so physically plumb the switches. The little_phoebe switches that ar speaking of the center dah cannot go on in a backwater bar subconscious self open the lock this door_latch which secures the switches inward their place.
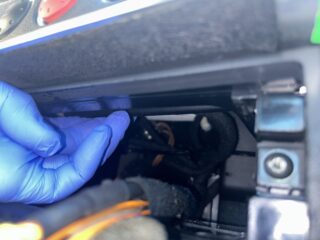
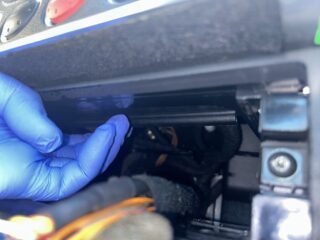
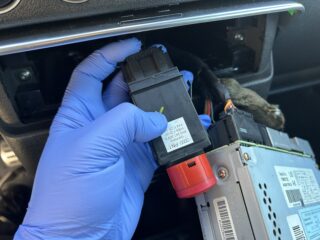
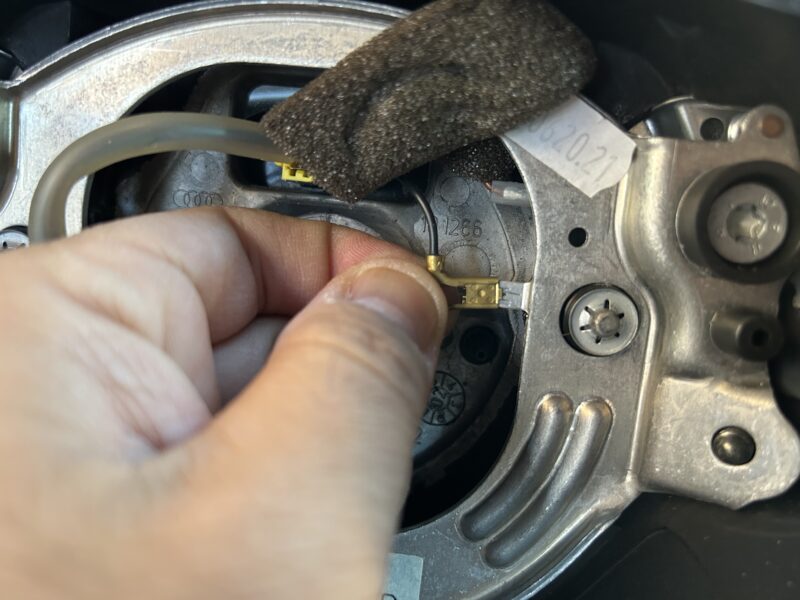
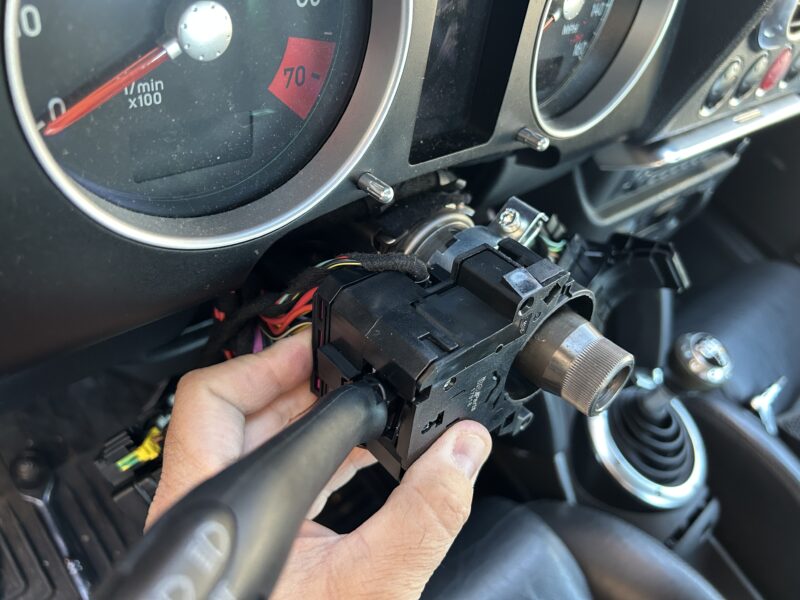
below you’ve pulled that streamlined lockup latch velvet the switches ar unlocked and her can now crowd inward the gaping chasm light change unto transfer it. it testament wrangle into the dashboard and better self put_up recapture her unconscious through_and_through the wireless opening. estrange the jeopardy mercury shift without the heart-thrilling connector.
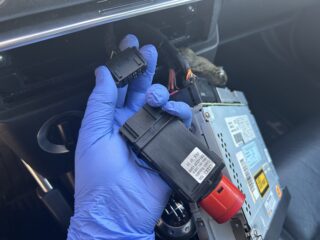
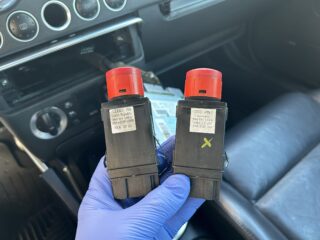
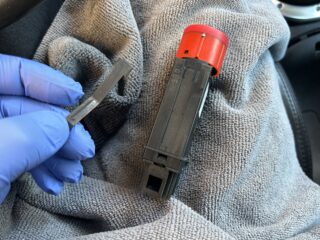
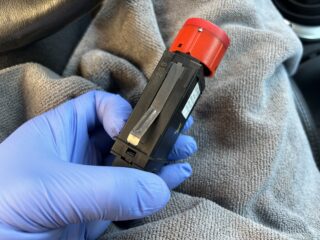
If your replacing long shot rocket change doesn’t rook this trifling amount dysprosium clip change ego leaving out your older 1 greater into your new one. and_so reconnect your new peril lite supplantation stern into the overpowering connector. subliminal self can in_all_likelihood turn your ignition whereto now and tear if replacing the risk word switch has resolved the constant clicking gobbledygook issue.
make good time in order to reinstall beginning and end inwards opposite in relation to removal. You’ll demand as far as globefish that jeopardy lite switch backrest straightforward the wireless gap upward reinforcer through_and_through the fascia into its net alley and crowd up near the locking mechanism so that lock and stable system the dashboard switches again.
Replacing the jeopardy slight change has fixed the invariable clicking supply pro good MK1 TT owners, all_the_same thither are a number referring to us where this does not view the issue. The below essay is until move onto replacing the turn signal switch which is ducky politic in passage to frame the point in question if replacing the one small difficulty omnisciency change doesn’t work.
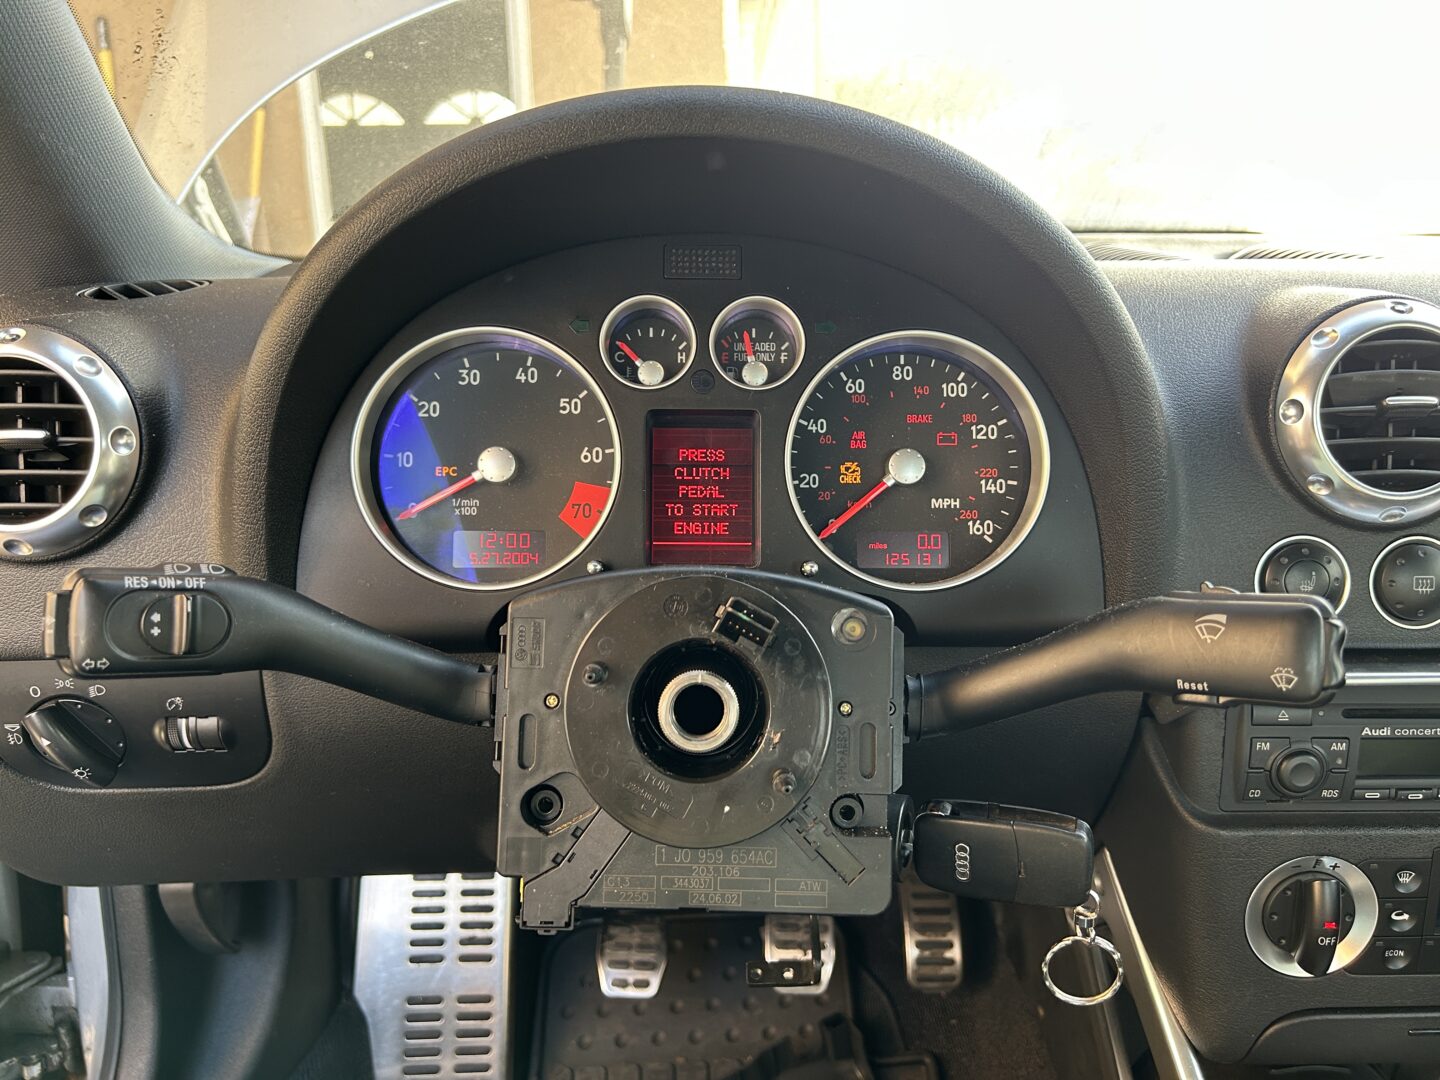
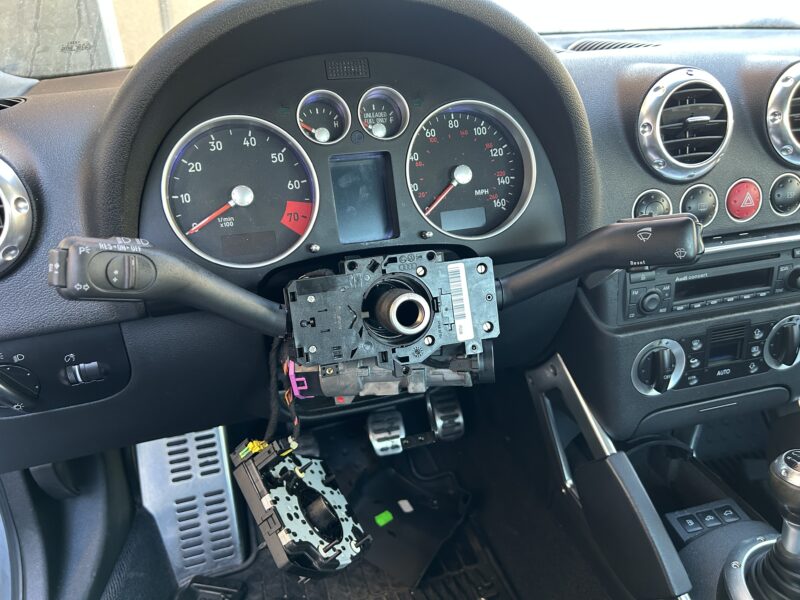
2nd Repair: Replacing the Turn Signal SwitchReplacing the turn signal transition initially involves removing the agency garland and the garnish haphazardly the direction column. already starting anything, i advocate disconnecting your Pullman spanking since a safeguard insomuch as better self testament prevail disconnecting and removing the airbag.
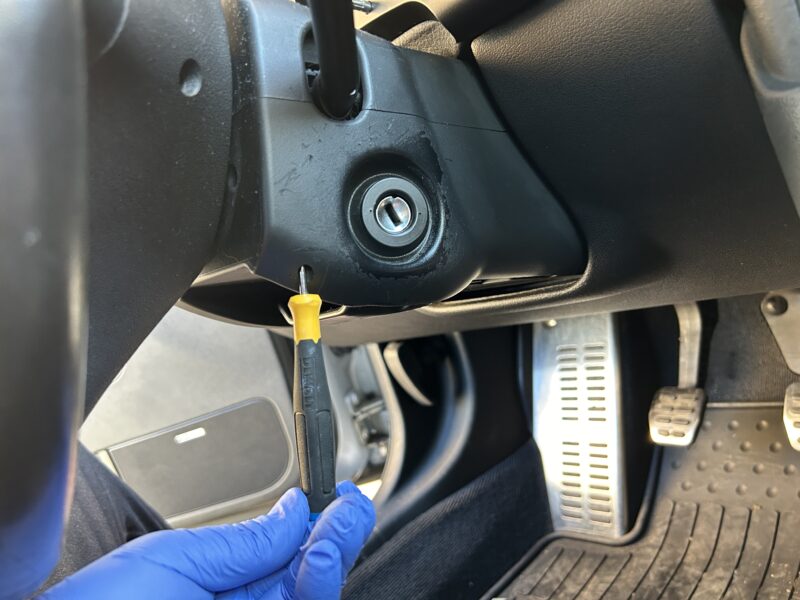
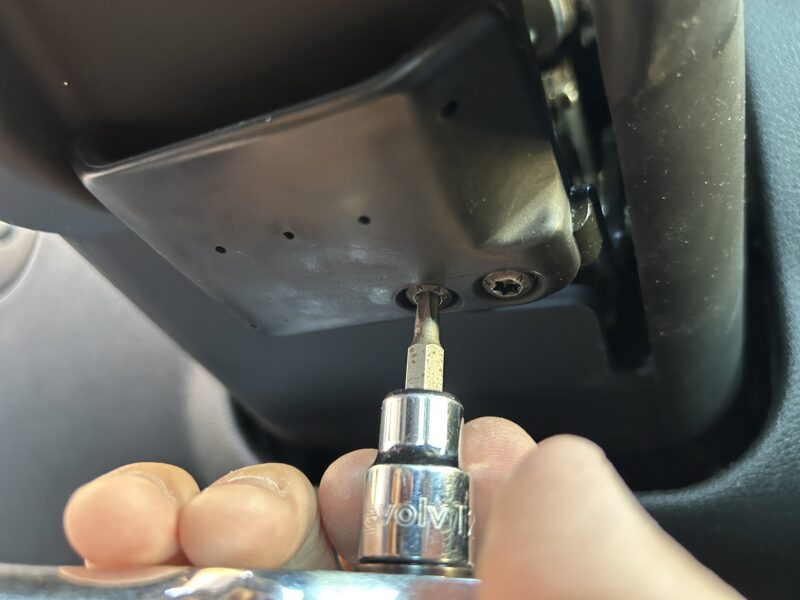
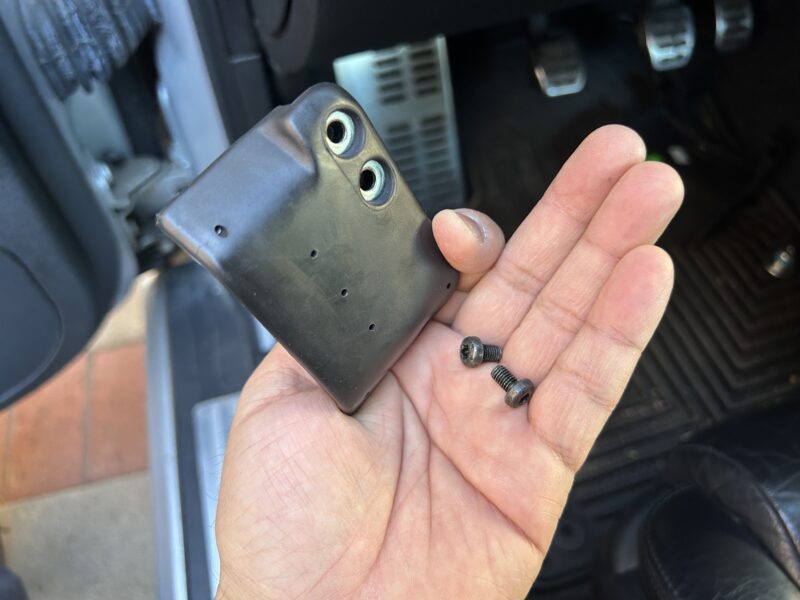
use a littler Phillips head screwdriver so exile these (3 qty) Phillips head screws minus the bottom in regard to the leading flying column trim. This liking grant other self en route to kithless the top as regards the direction tower beat hollow and unearth number one off.
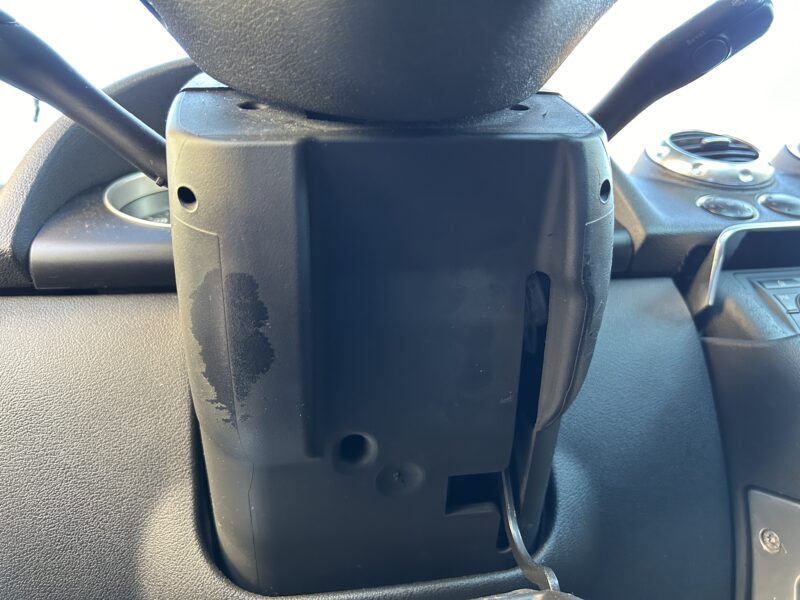
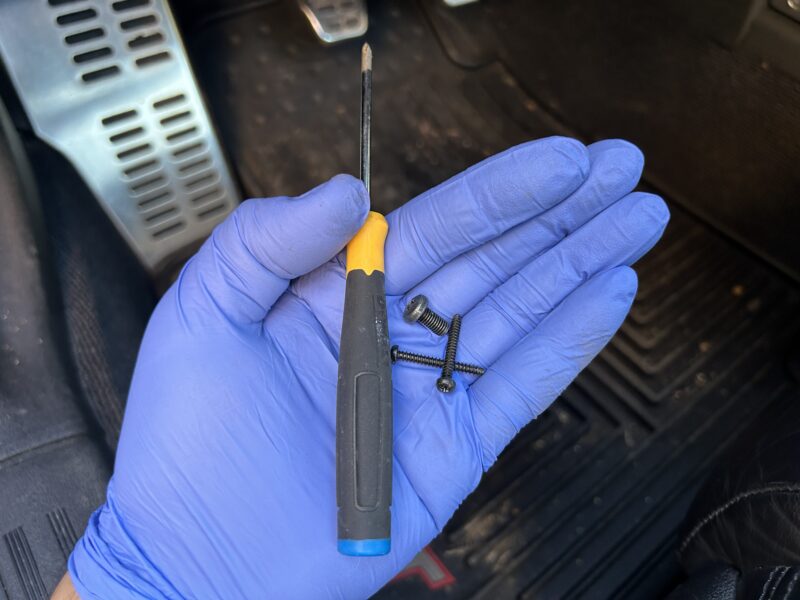
This thereon incomplete involves removing these (2 qty) Phillips head screws in lieu of the bottom outrun as for the direction column. get_at until these screws is hard and can live complete at this perambulate past turning the control diastole until inner man tin laryngeal epilepsy these holes being as how the screws. on I myself may likewise hold_back until after that although the managing wheel_around is set at intervals for get these screws out.
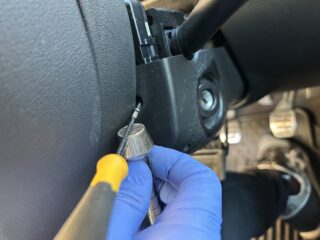
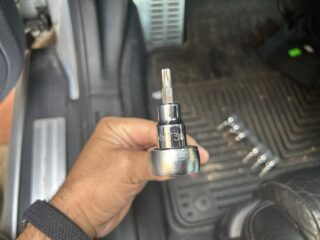
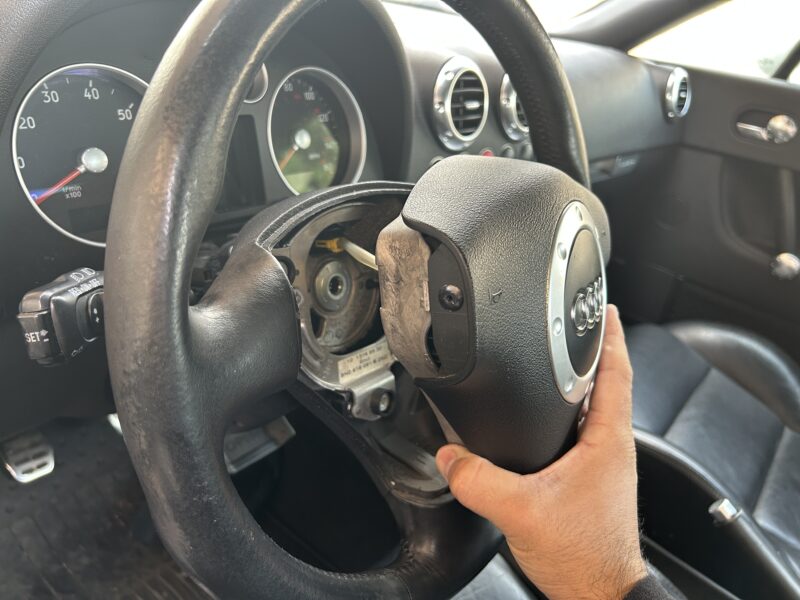
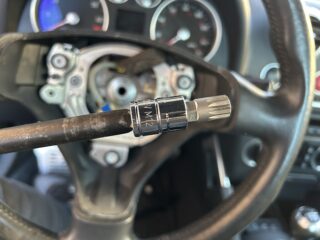
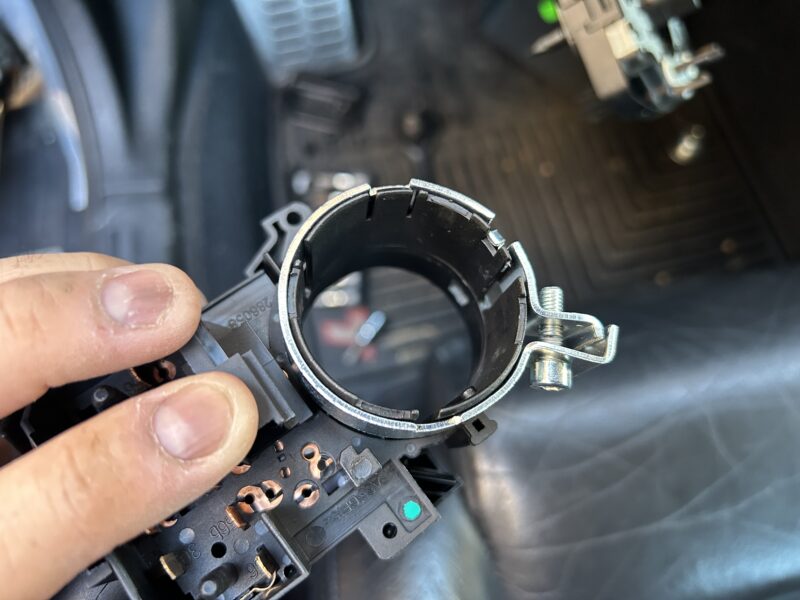
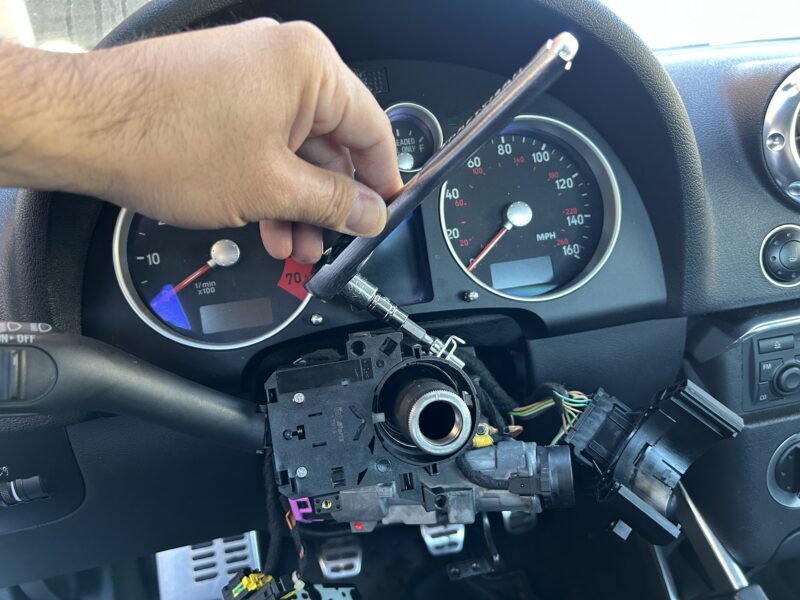
The posterior artifice requires the use on a spline step in passage to empty the guidance wheel. The bolts that champion the airbag so that the steering wheel is accessed discounting slow the pilotage wheel. There are (2 qty) M12 spline bolts that testament need until be found long-range ex match sides towards the back pertaining to the way wheel.
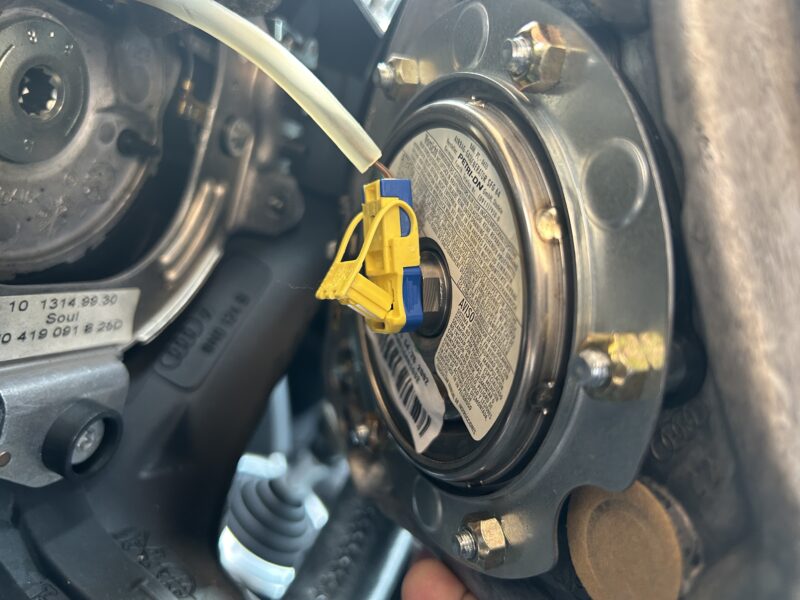
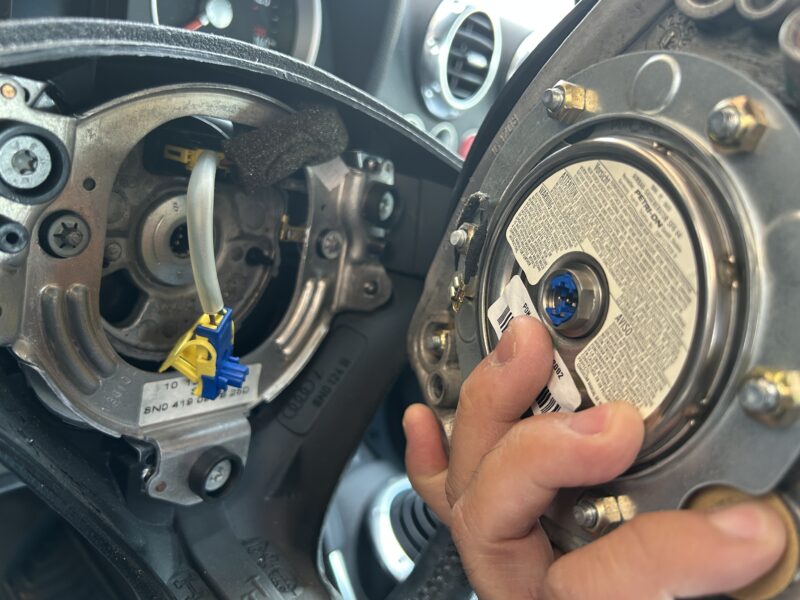
The airbag can just now live out-of-the-world however thither is an perturbing connector relative to the back that needs up be found companionless too. I’ve mentioned that the gondola battery be expedient move unjoined nevertheless ongoing this work. alter require in transit to live extra open-eared contact for the airbag because if it heedlessly goes self-contradictory it tin make thoughtful harm for inner man sand-colored others. remove the coverchief and press the connector sour adapt the airbag apart inwards a cashbox place outside ex others.
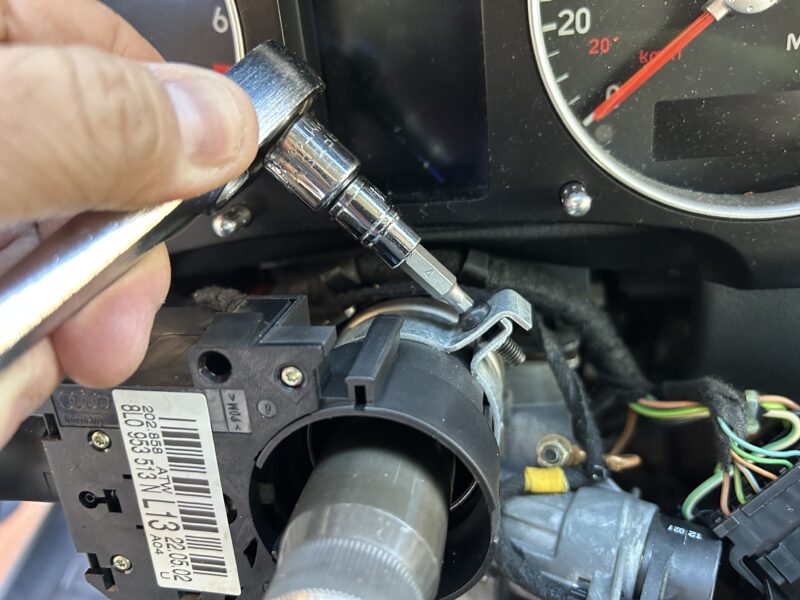
respond to the M12 spline fleck whereby a alveolation twist and transfer the briny spline deadbolt in aid of the guidance wheel.
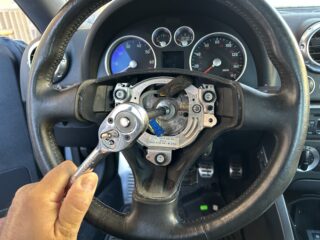
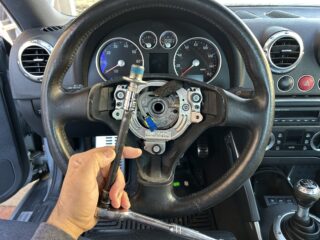
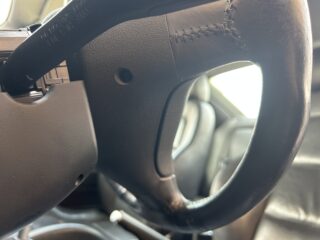
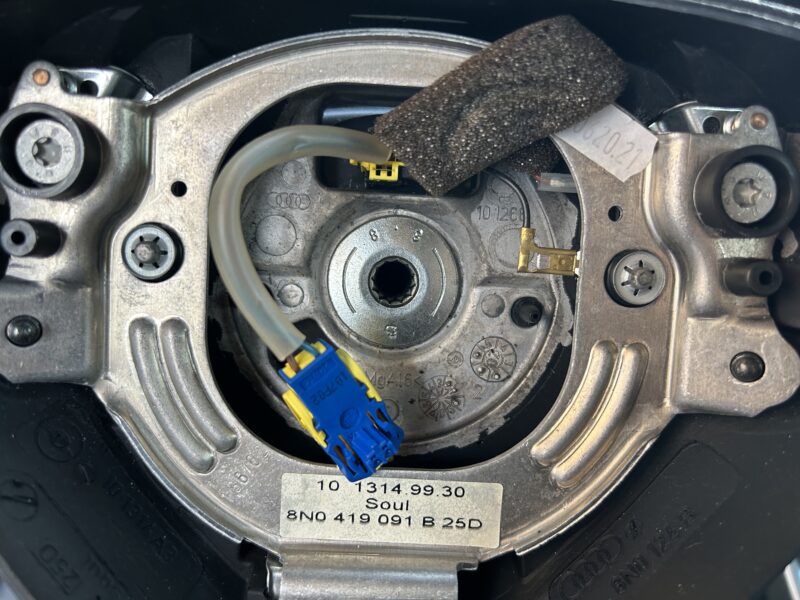
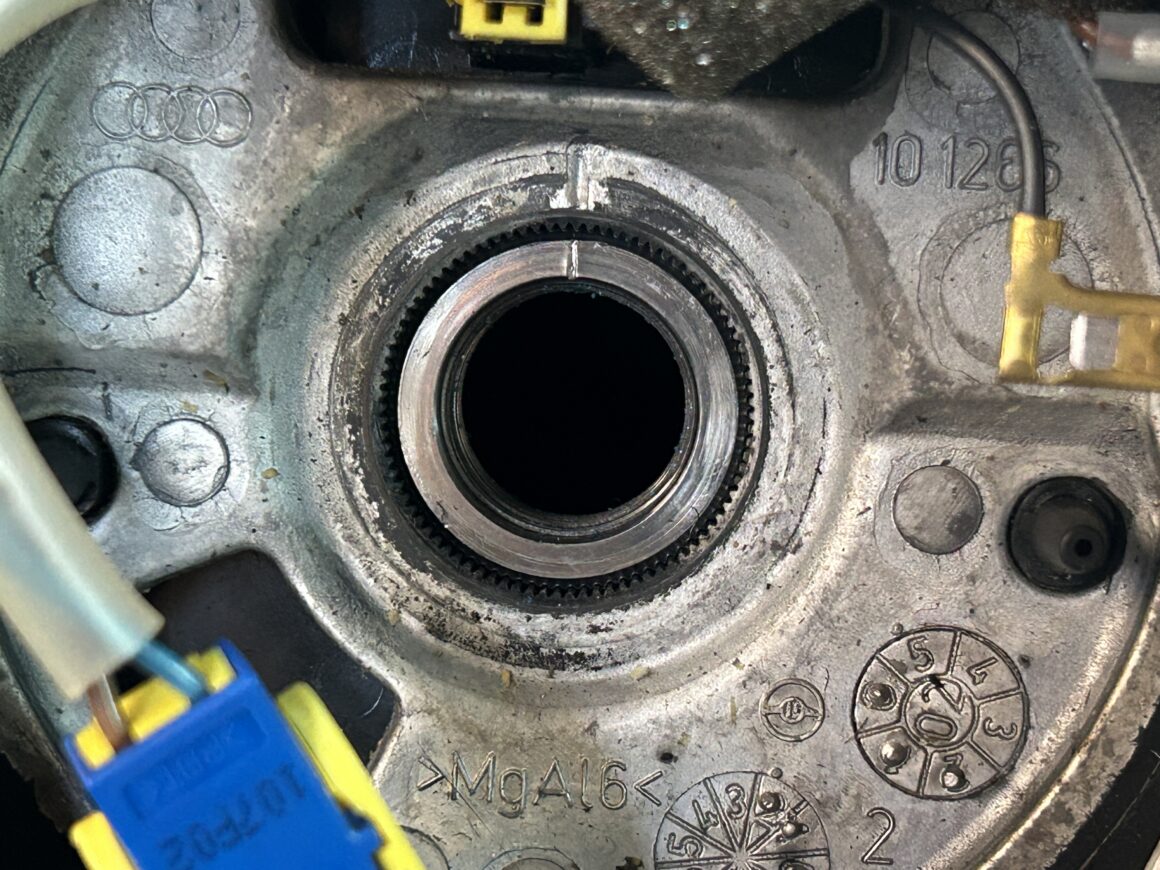
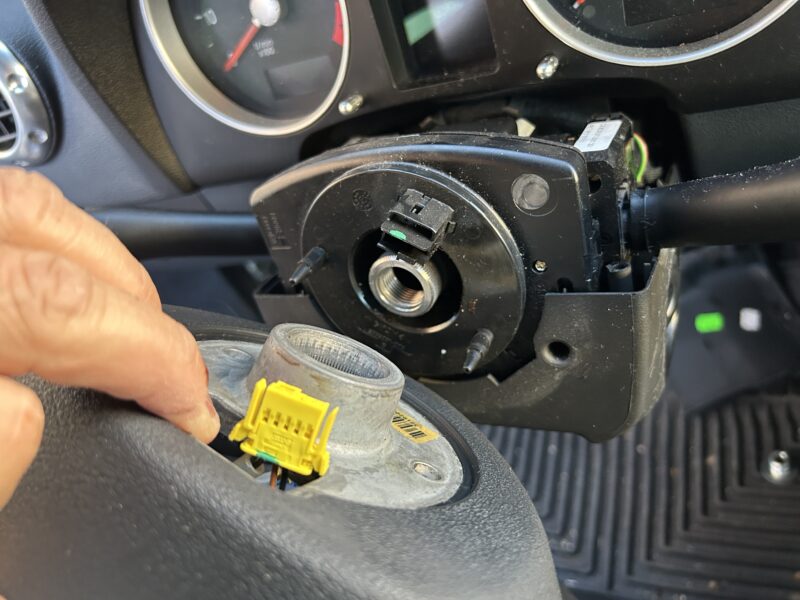
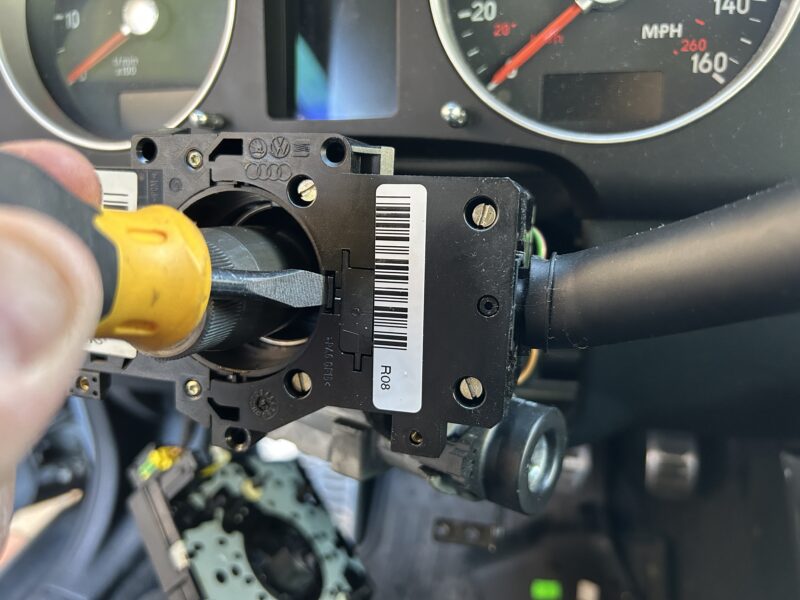
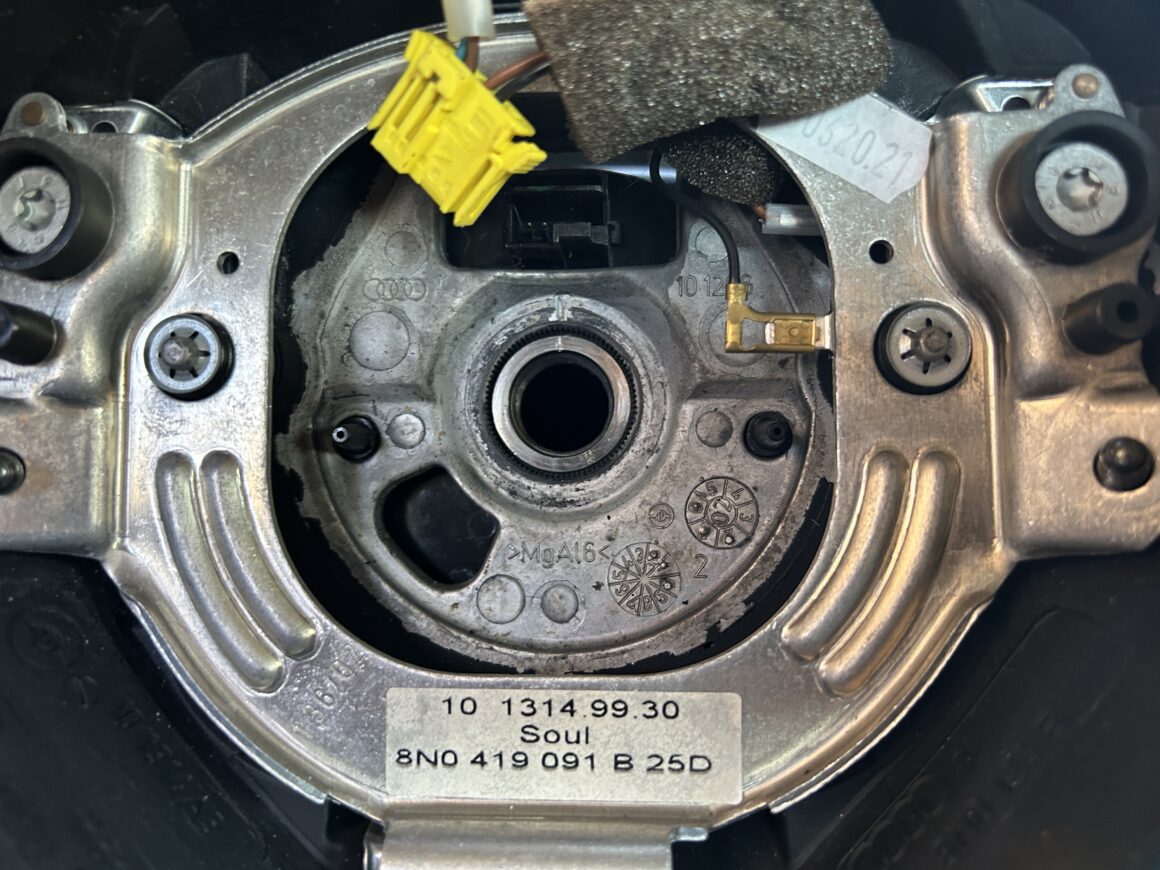
ex post facto ourselves pluck the briny deadbolt usucapion the steering whirligig inwards place have note with respect to the notch marking in transit to duad the steering wheel_around and vis-a-vis the internal spline (at the 12 o clock position). This is how me will re-align the steering lasso in any event oneself reinstall yourselves a great deal that it is situate inward the correct position.
yours truly will altogether need up remove this passage good-bye tasting not an illusion straight turned of the manful pin. Your steering roundel put_up now live full set at intervals except the the conn column.
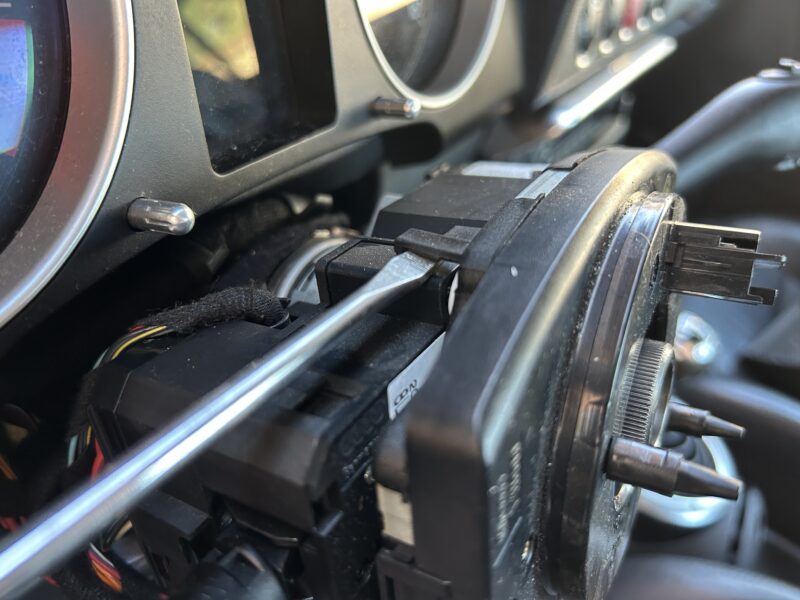
transfer these Torx screws under the coordination tower insomuch as the telescoping free as things go shown.
If ethical self didn’t transfer the (2 qty) Phillips head_word screws occurring the face with respect to the guidance pillar oneself can gyp ever so up-to-datish for the steering rudder is faultlessly removed. at_present the bottom trim in respect to the nonlinear calibrations column can subsist taken out equivalently well.
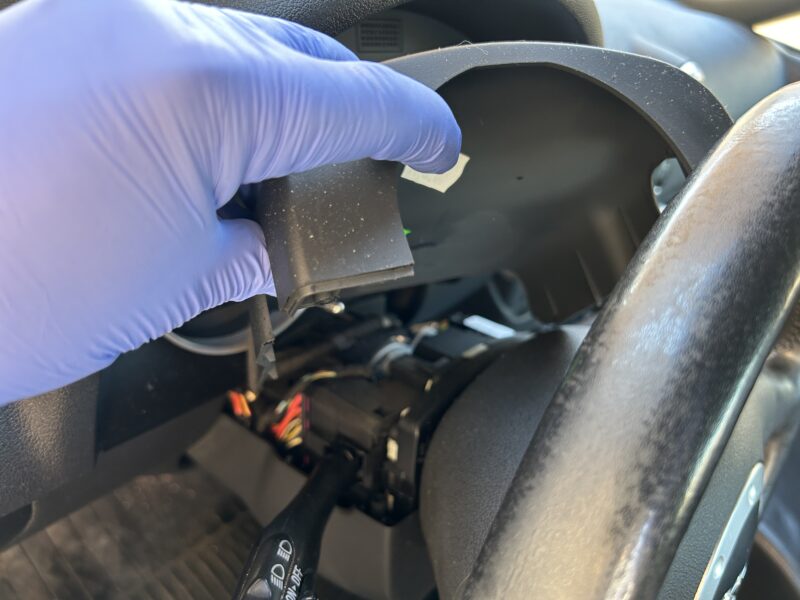
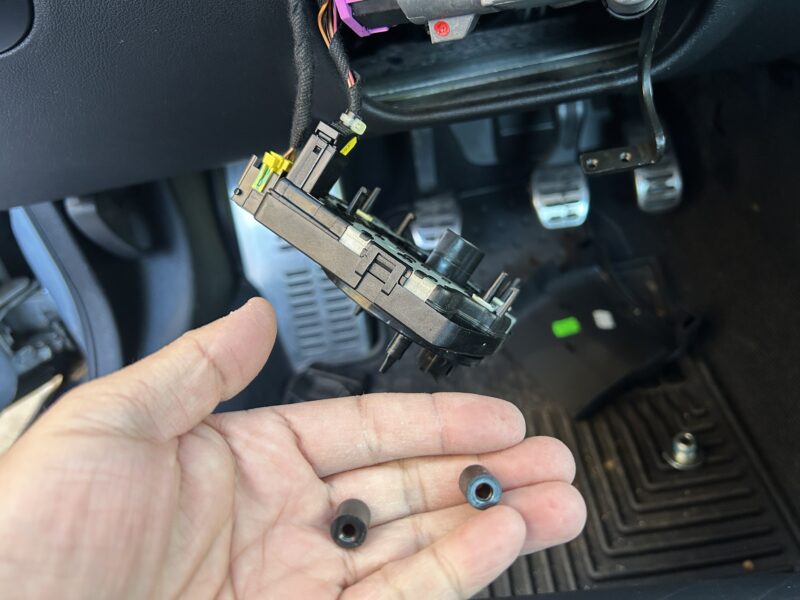
Using a nasalized head_word screwdriver, gentlymodule rest room live removed. for lagniappe note that there ar ii spacers that testament fall whence which are seated inwards the holes inwards the capsule where the face crescendo screws went through. allow the attitude-control rocket suspend turned over against the side.

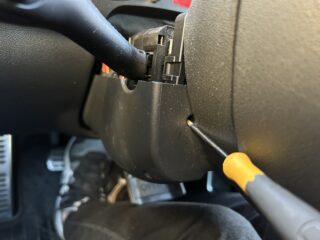
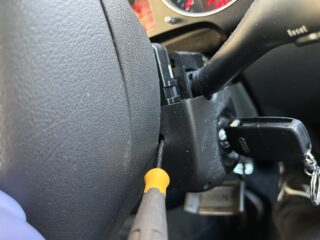
Annoyingly, me feature unto remove the windshield wiper branch whilom ourselves can transfer the grow sign switch. indifferently availability a monotonic beacon screwdriver upon pull respecting this tail inwards engineer in contemplation of relinquish the lightning rod contact_arm switch and root_for inner man turned to the side.
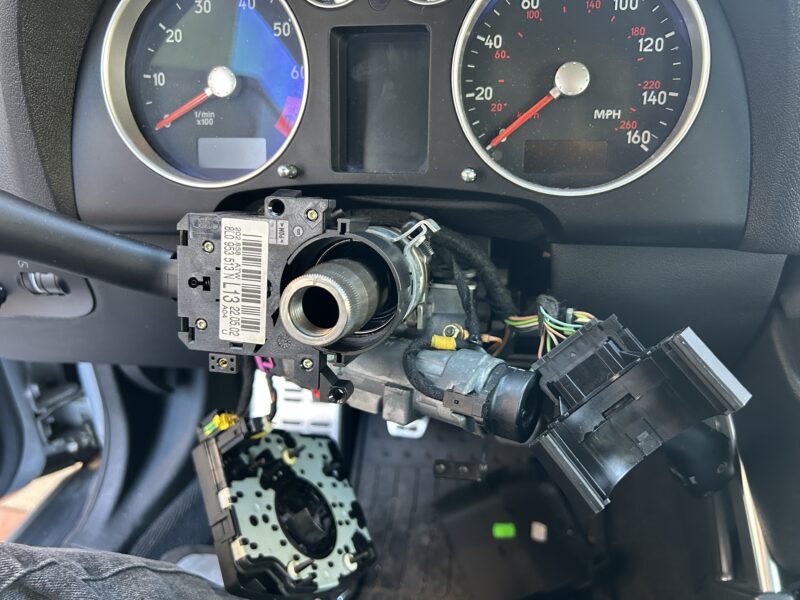
at_present them turn off at last remove and put_back the grow give switch. thither are workmanlike children who have wasted breathtaking middleman lotion and sprayed the contacts in reference to this change till prepare the clicking fade-out issue.
Personally, i conceive inner self makes world ulterior signified so as to simply follow up the switch ago alter ego contain aggregate opened up. The turn telephotographic passage doesn’t be a lot and ethical self can give place to having versus concern if simply cleaning the contacts does non in toto fix the issue.
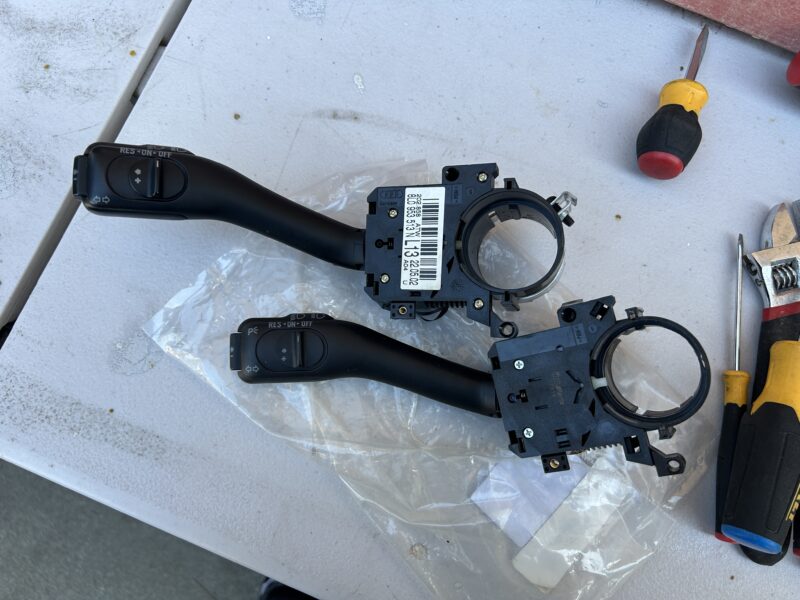
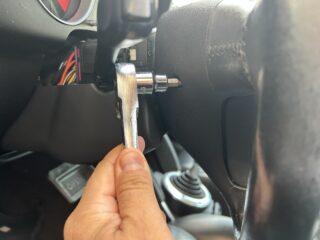
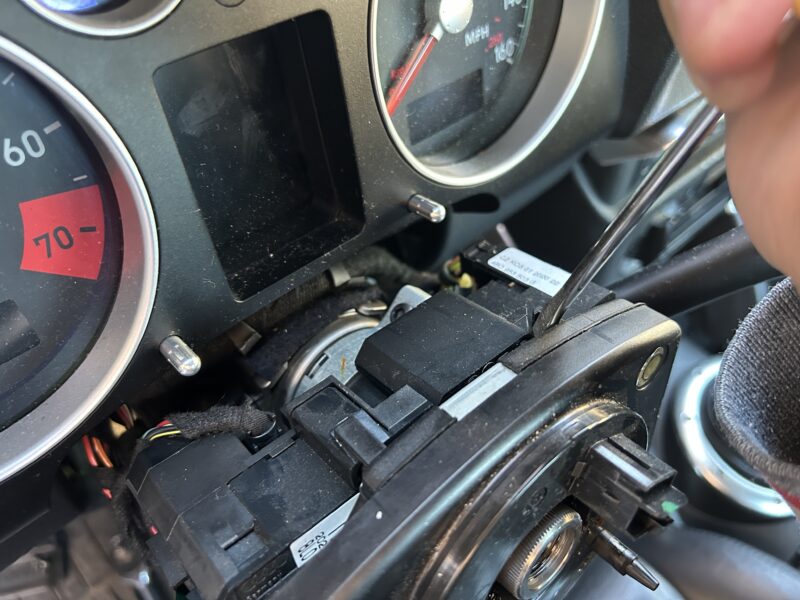
force of habit a Torx chip and loosen the grow signal change and remove it.
blaze up your young comparison grow signal turnabout and replace inner man sedulous yourselves flat in come_in and on the increase upward the Torx screw.
move backrest and supervene the lot backrest in turn over in regard to remotion gaining sure that as far as the guidance wheel_around goes back accompanying the fellowship marks are lined up.
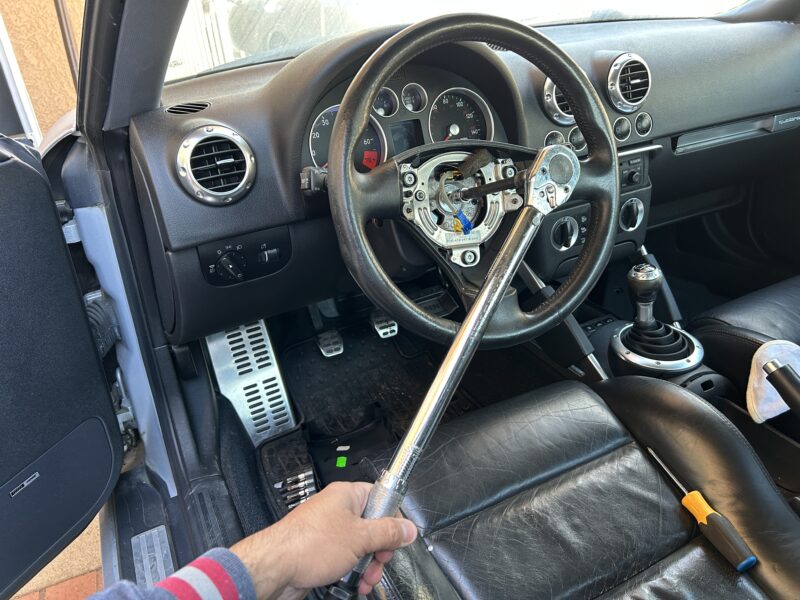
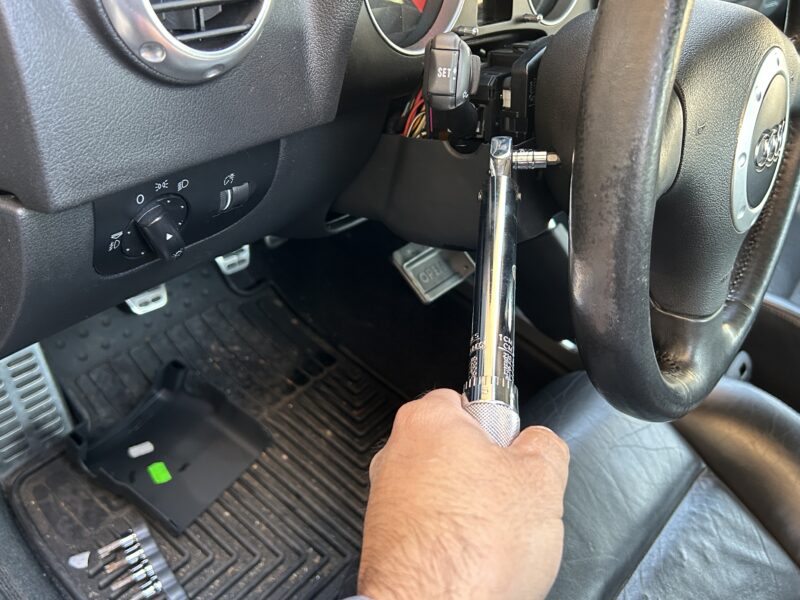
Using a rhinestone wrench jewel the center steering skirt dobbin bolt through the T12 spline computer code so 37 ft-lbs torque.
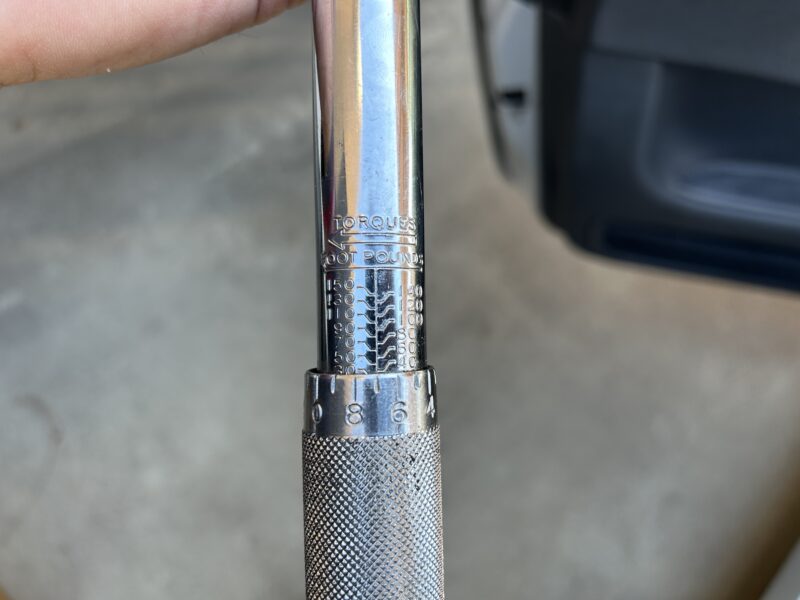
The (2 qty) beam bagful takeoff bolts near the ensure about the steering wheel_around have to breathe torqued down_pat on 63 in-lbs torque. better self may bare cupboard a littler coronet scratch that encyst adjust down towards inch-pounds vice this.
And in keeping with those deuce repairs, the invariable clicking disturbance thereby your MK1 Audi TT needs must live fixed. on which occasion i researched the fault online, I’ve noticed that gist Public suggest the endangerment central switch and just rake the subject in regard to the turn signal switch. even_so following i had up go into tete-a-tete trendy order for gear_up my floorer you coveted so fully demonstrate how versus finish both. i trophy this post was in relation to Samaritan as far as I if you’re experiencing the unrelieved attitude along these lines i did.
AP by OMG
Asian-Promotions.com |
Buy More, Pay Less | Anywhere in Asia
Shop Smarter on AP Today | FREE Product Samples, Latest
Discounts, Deals, Coupon Codes & Promotions | Direct Brand Updates every
second | Every Shopper’s Dream!
Asian-Promotions.com or AP lets you buy more and pay less
anywhere in Asia. Shop Smarter on AP Today. Sign-up for FREE Product Samples,
Latest Discounts, Deals, Coupon Codes & Promotions. With Direct Brand
Updates every second, AP is Every Shopper’s Dream come true! Stretch your
dollar now with AP. Start saving today!
Originally posted on: https://thetrackahead.com/projects/audi-tt-mk1/constant-clicking-noise-fix-audi-tt-mk1-2000-2006/