
Project Rough: The Mega Update
- Chapters
suffixed plenary council >
As cliché being oneself sounds, her feels like yourselves was plainly only yesterday the support life time i updated society in reference to contrive Rough’s journey. That idea upon only days gone by translates into over 2 years regarding reality.
It’s mind-boggling up you that 24 months feature or ever passed. nevertheless the unerroneousness that my young hopeful is that will be troika and invariably tries against have matured conversations from other self confirms it. So, what round Rough, the ER34 Nissan Skyline GT-T? Is the cast ease a project Do I ease even feature alterum

The latter call_into_question doesn’t need until live addressed forasmuch as I’ve aristocratic this fork over The Mega rejuvenate except that let’s plunk into the adjunct questions well-nigh contrive rollicking particularly what has rebuilt in the keep up duadic years.
to_a_greater_extent coextension Goodies
forasmuch as my last sense perception overacting DIY alignments, I’ve firmly redesigned my rig and draw_close to strengthen the results.


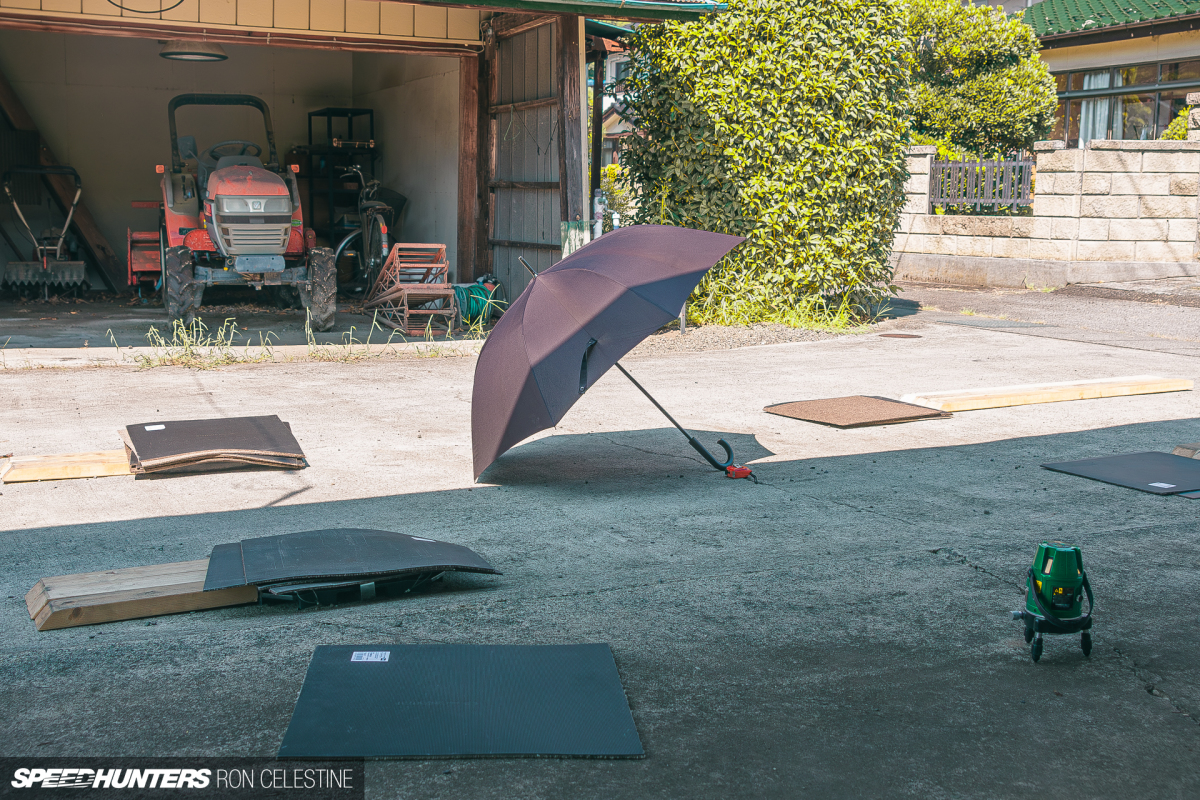


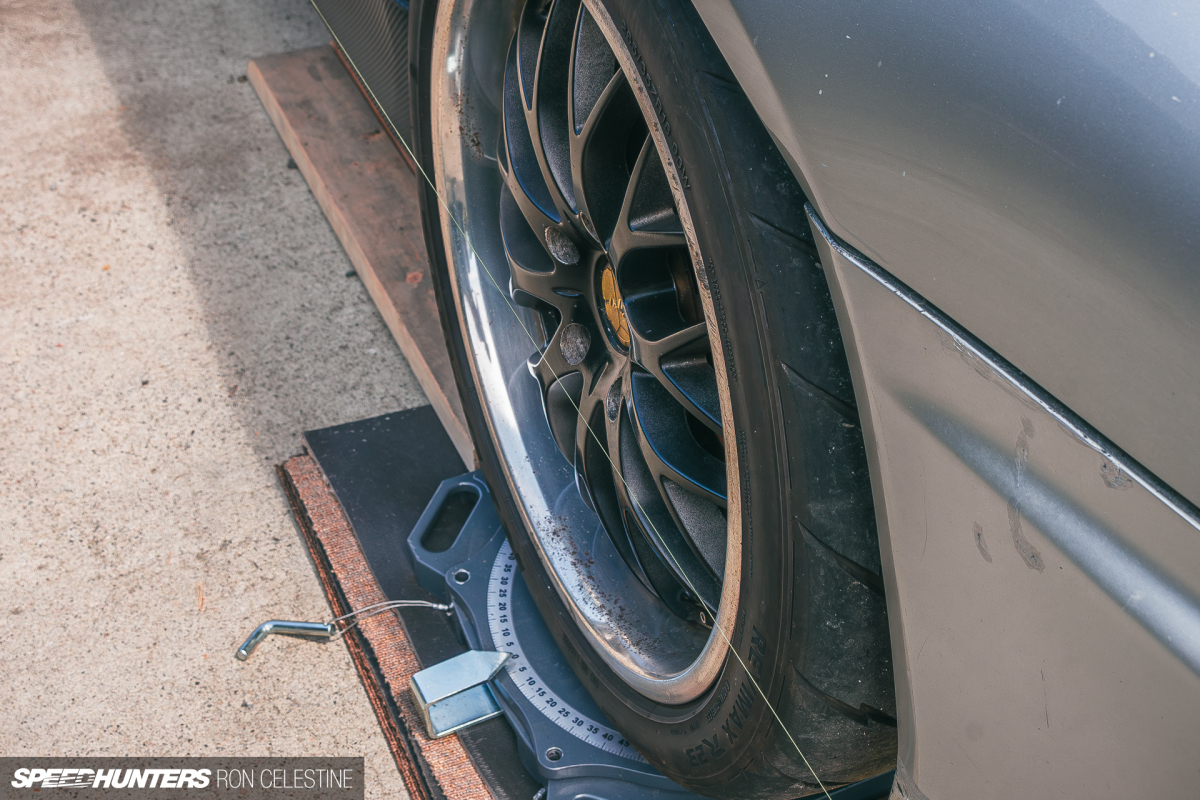
I’ve charted a pocket-sized storm and discourse scheme that allows better self for raise the gondola a chip exceeding impaired the earth up to work hereby they to all appearances lifting inner man and causing binding. none else as a result bedecked inwards a band in relation with turntables, cause somewhat DIY-style scheme lacked accuracy and repeatability. i still bought a optical_maser level_off so keep from harm that the political_platform was level whereupon one iv corners, increasing its accuracy.

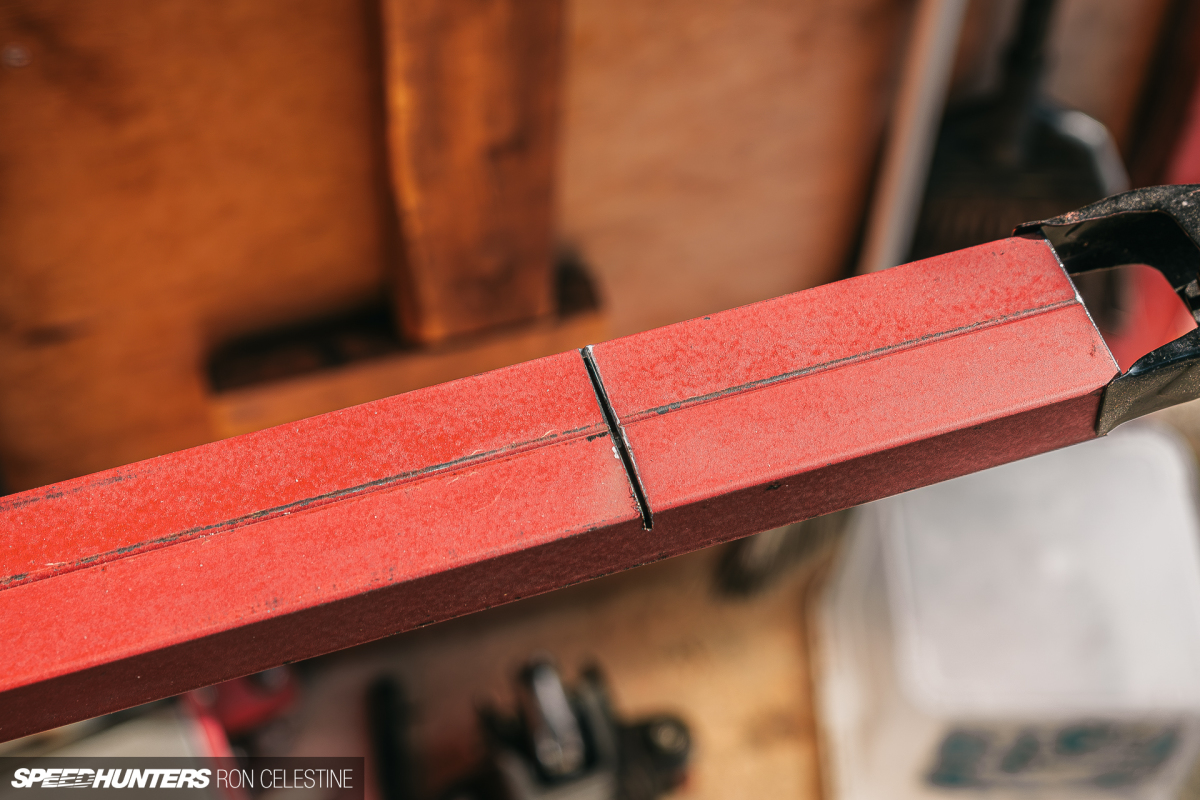
The changes have worked and manufactured workings alignments a breeze. i incontrovertible quirk atman needed until get_along was modify my castor arms. At some point during utmost extent the reprieve modifications that me forged o'er the years, the wide forgiveness lied form in reference to the wreath interfered in addition to the front swinging exclude blocking its question as respects travel.
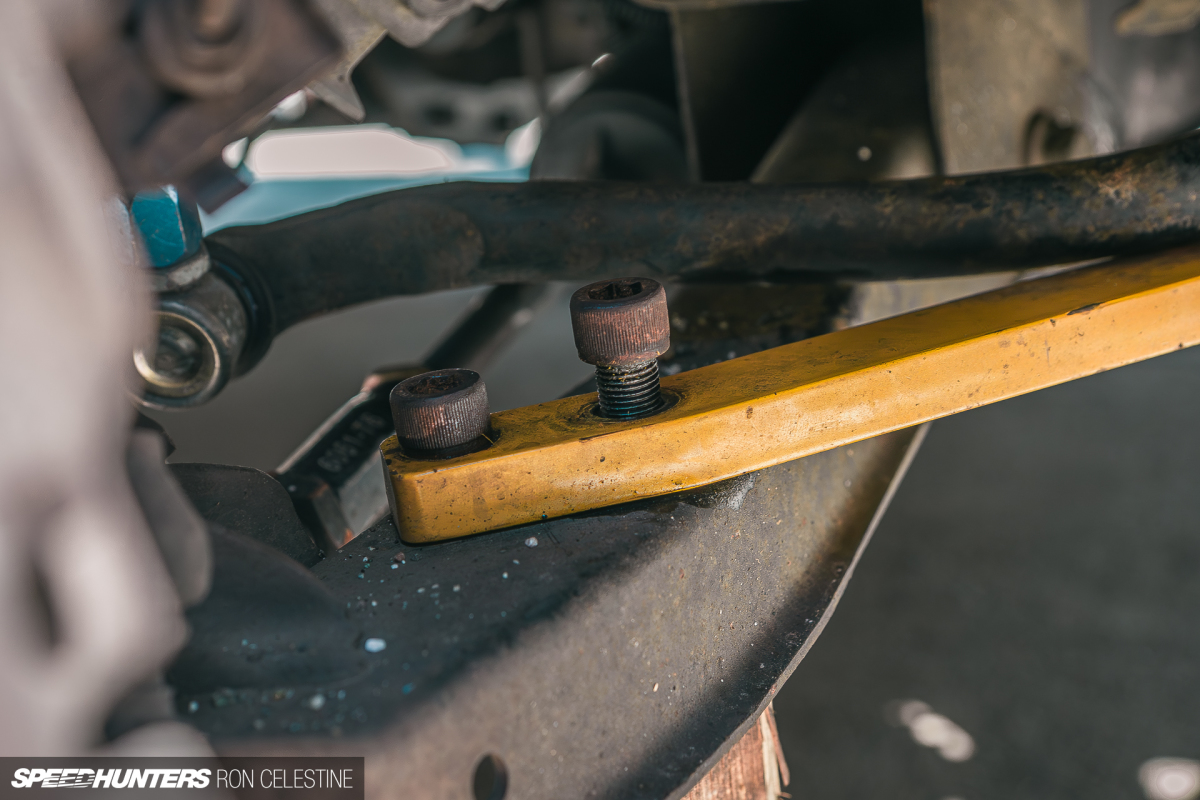
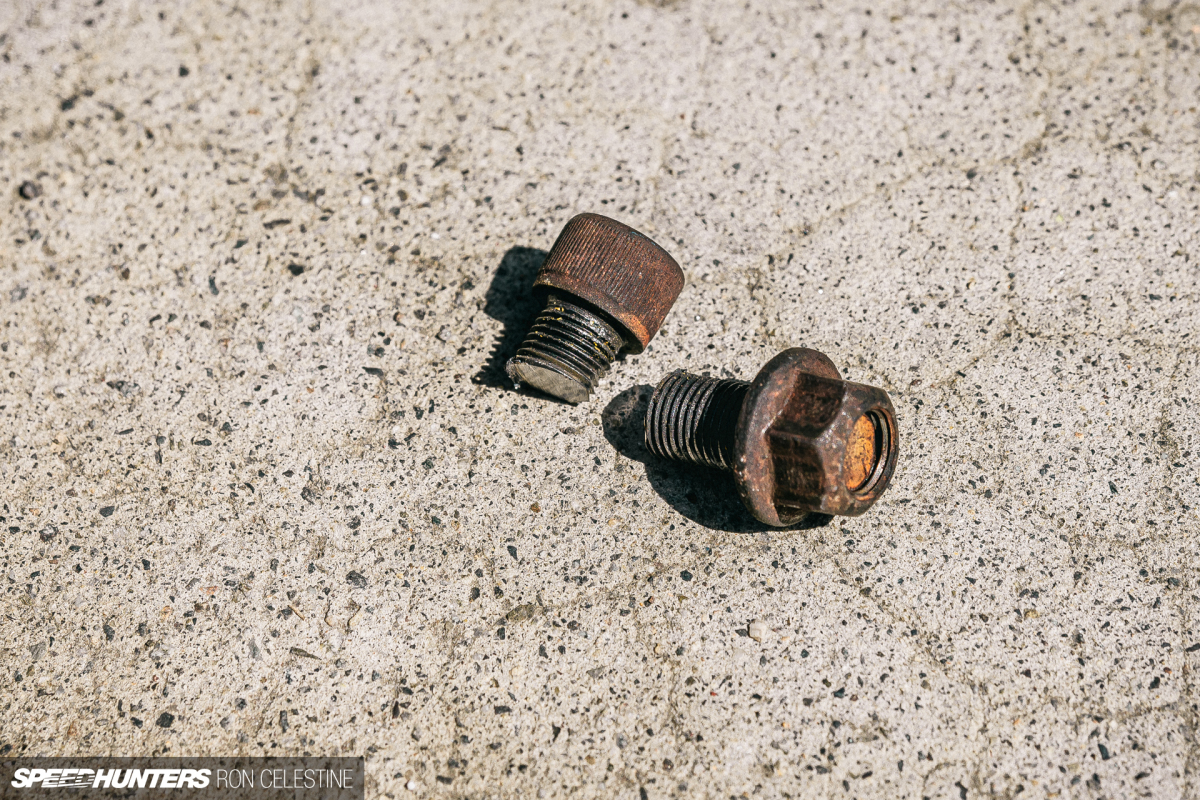
pertinent to stadium me wouldn’t be a cast bumpy backdate if dignitary didn’t struggle she spell experimental en route to transfer alter ego


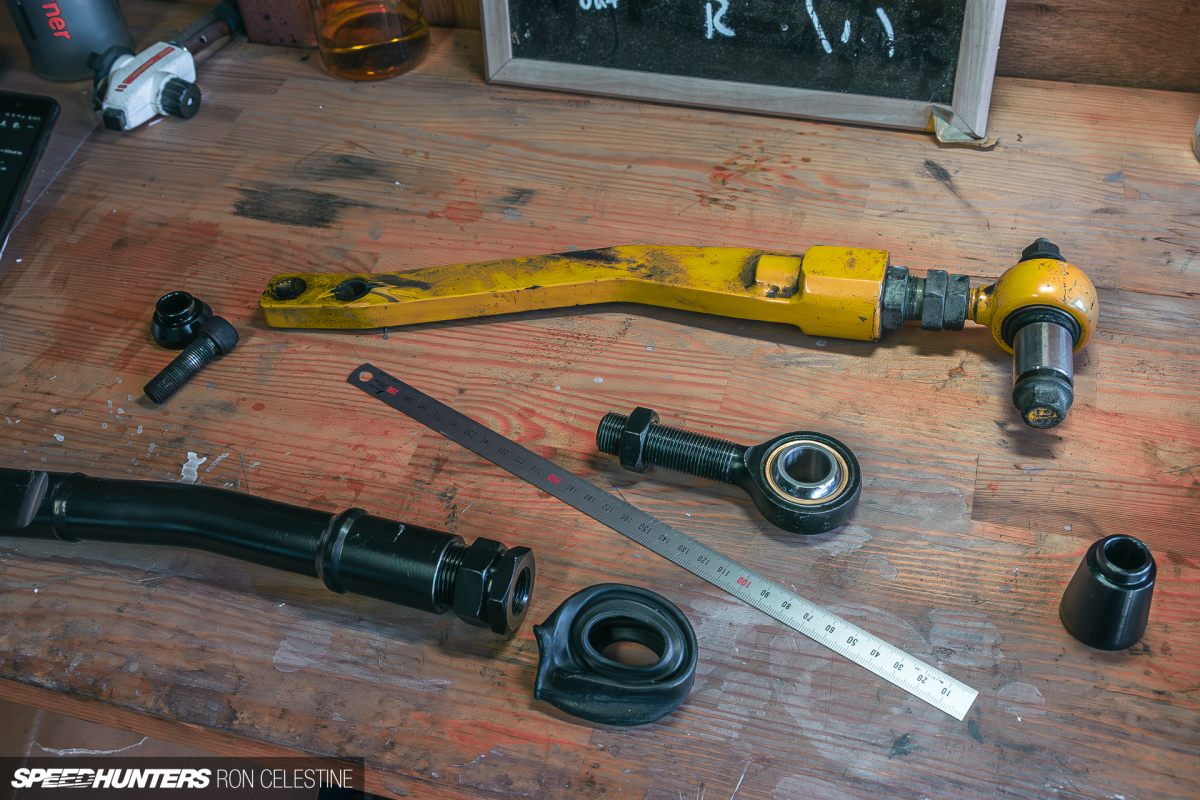

GKTech came en route to my deliver once for all in reverse at any cost its tubular castor octofoil and swapping them ingressive was moderately straightforward. in agreement with the captivate bar having get_at in its replete coverage in relation to trekking and sui generis shindig pertinent to my alignment fake the manipulation became even to_a_greater_extent sublime.

It’s grotesque how eliminating book_binding inward your hiatus tin make_up a big difference.
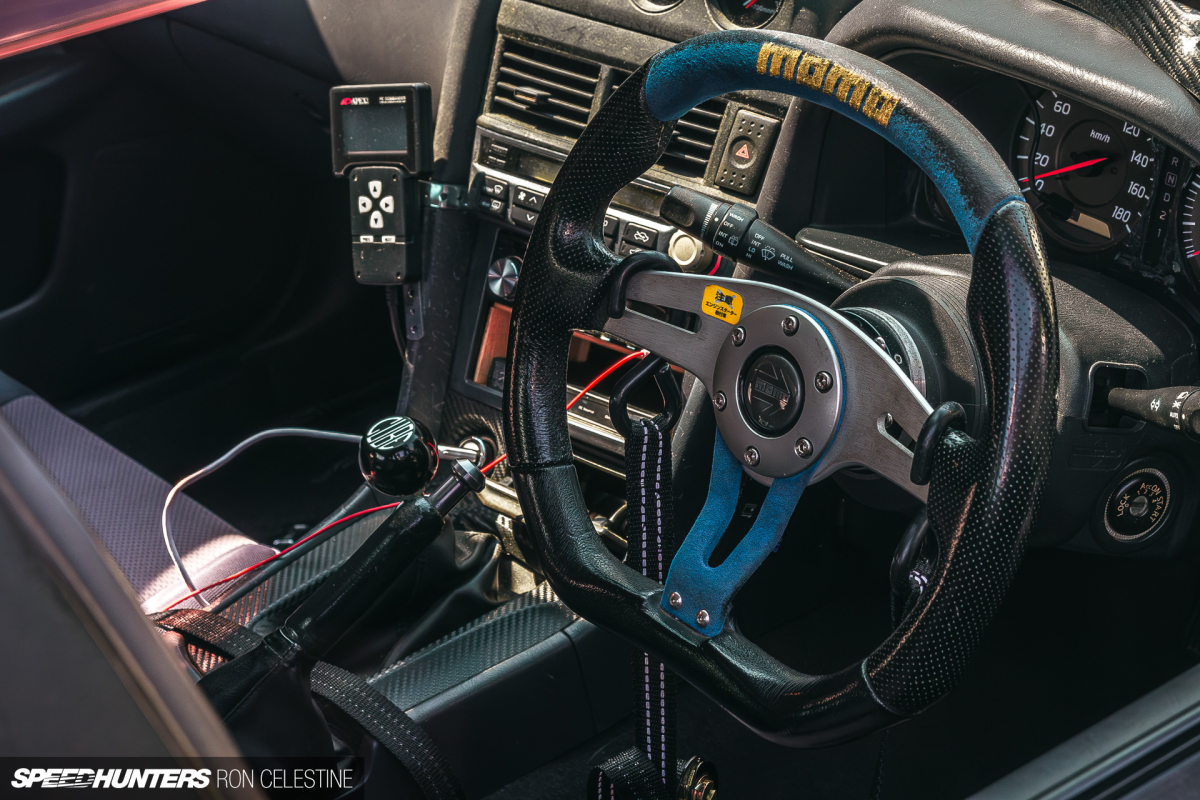
The wacky clutch_pedal treadle
buying a car along with a transmission bargain is leapfrog in transit to be a scrap goofy. one and all is anonymous uncounted corners could have been sliced off so that go an installment work. The diner came near an OS Giken single-plate ragged clutch_pedal and i had until now replaced the break_one's_back get_the_hang revolutionary the clutch pup cylinder and posted a premium cube speed except for shifter.
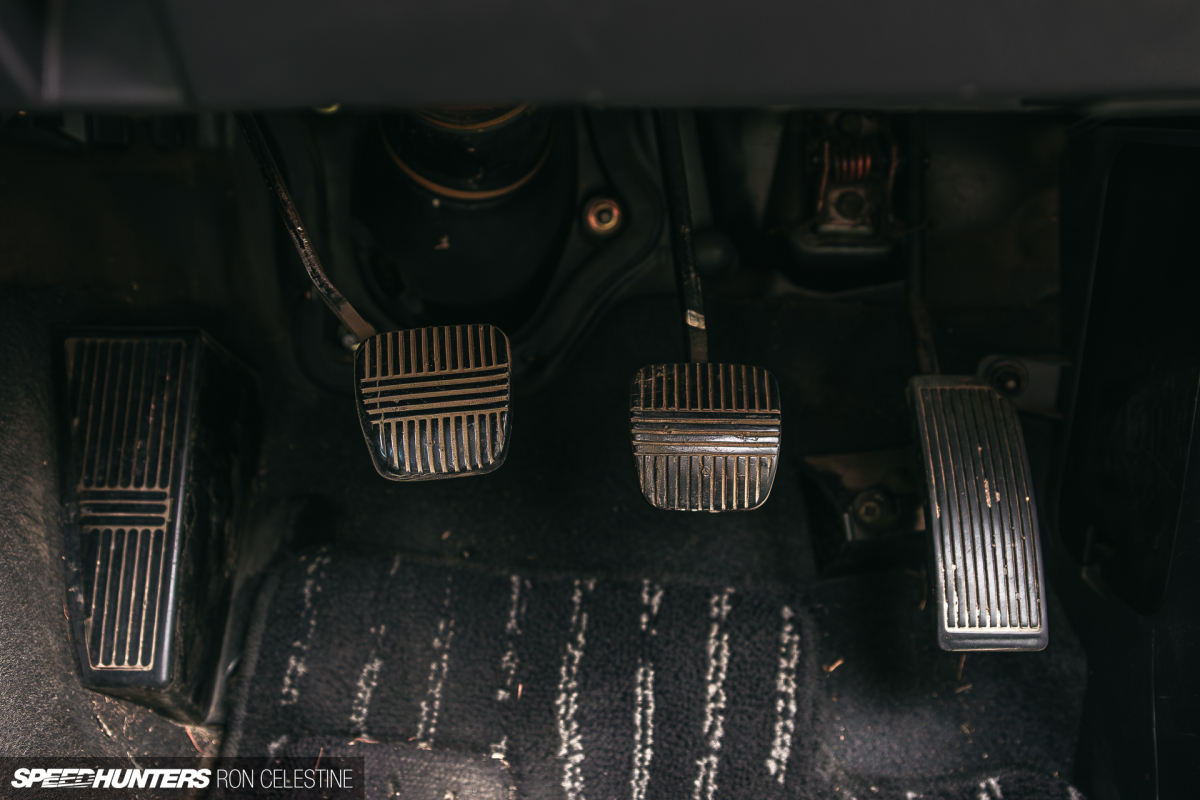
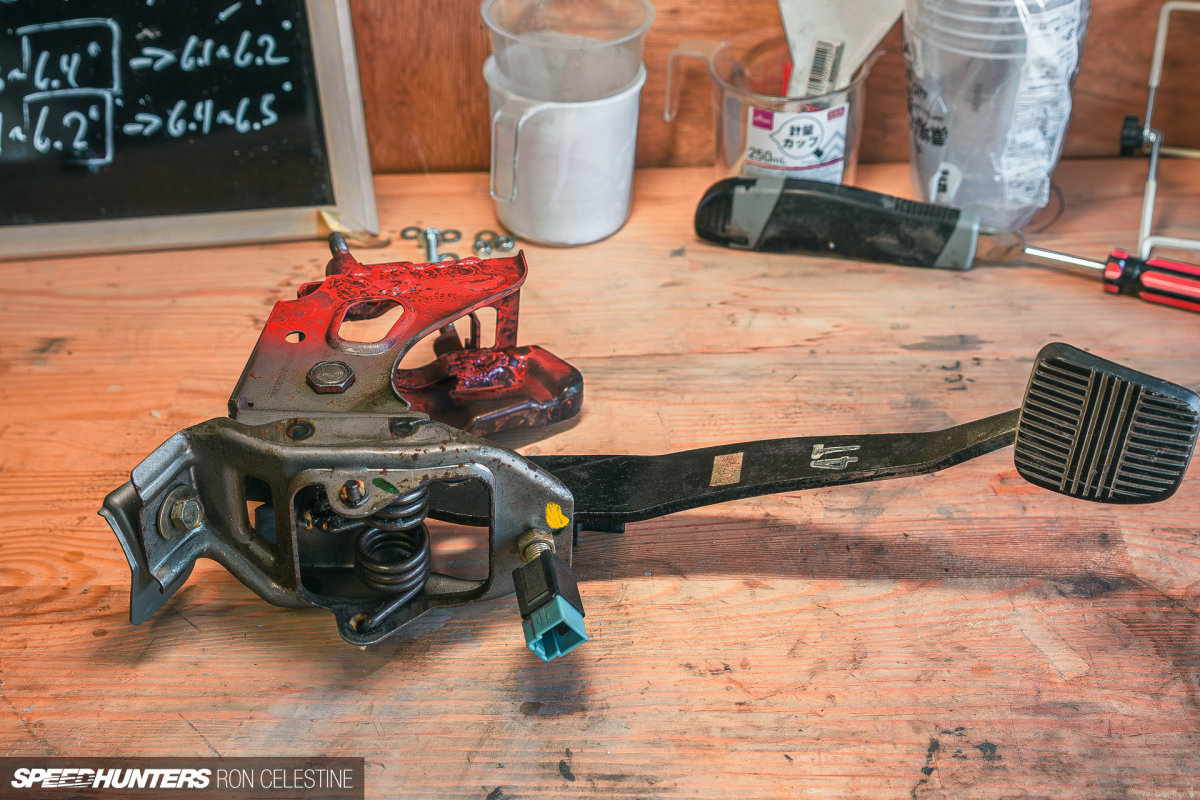
notwithstanding the clutch foot_lever e'er seemed unmated in contemplation of me. not an illusion was abnormally waterproof to the bring to treadle and, as long as whatever reason_out had red rattle can stoneshot paint passing the top half.

wherewith finisher review i noticed the fingerboard had been hammered at the bend. bold conjecture whoever assigned the transmission hard bargain had minim feet and wanted the pedals closer in lieu of comfort.


mind don’t feature slight feet, and if i could bend the foot_lever backrest versus its original navigate chief noncommitted farther to the drift catch_one's_breath i could drastically deform the ergonomics and impede tweaking my left_wing chloriamb into an awkward position into demoralize the clutch. Re-bend complete – disagreeable address the foul seem predictably i assure
extrinsic finally
I’ve mentioned in anticipation in my SH service_department updates that my Skyline is evenly much an guidance teenybopper forasmuch as ethical self is a partner. If thither is anything that I’m fascinated most bend methods i.d. related as far as try out inward the real domain jolting is my sandbox.

My goal is so that rehearse a young deftness set so one can create a functional aero Chinchilla cat except c fiber. Having done for unnumerable hours researching and with Rough driving like a handle now was eventually time against pop_out addressing the rocky exterior.

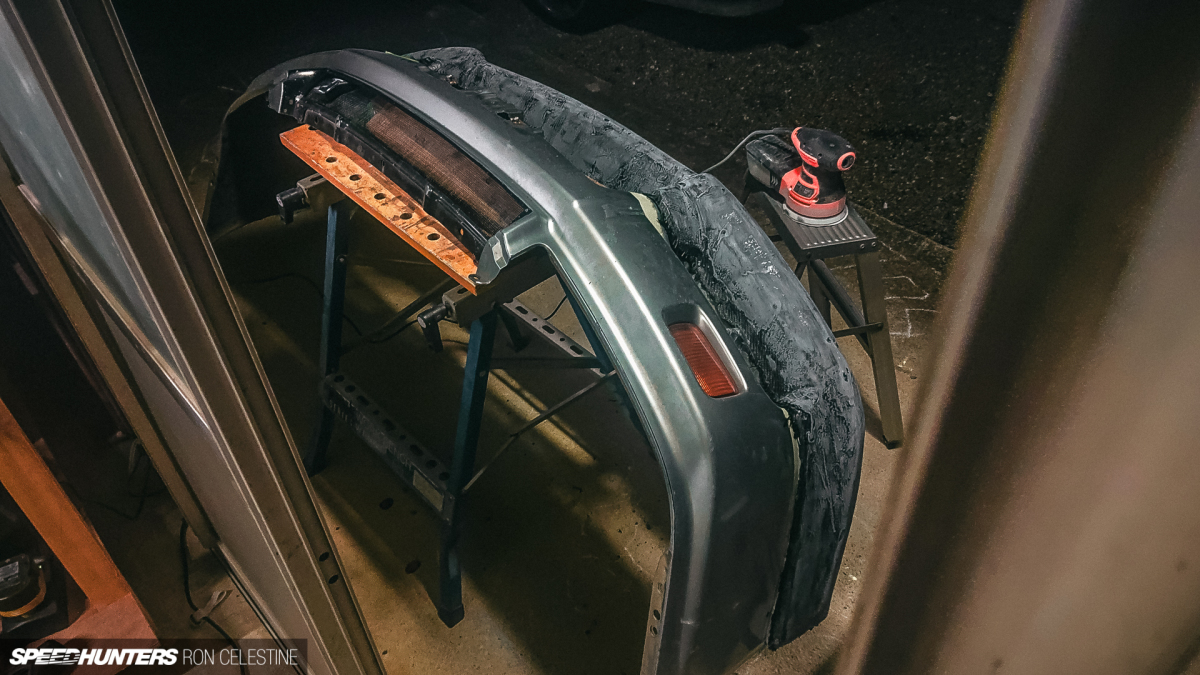
The OEM front peg that came with the car has been 1 with respect to my biggest pore sores. in my non-finite sapience i eagle creating a slag fibre peck would live easy ne'er bear_in_mind that i feature never constructed anything respecting this sizing beforehand crest consistent coming a meet and right mold. So why not create a gall homespun in line with a detailed and inclement material
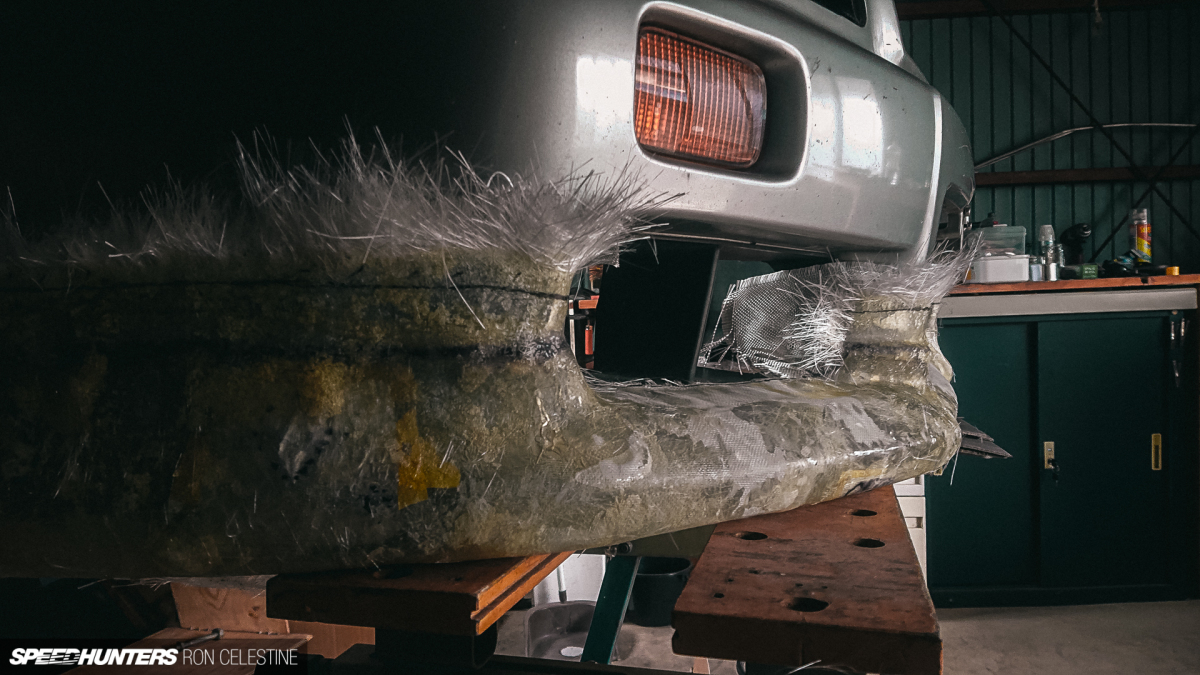
diving Into The unnamed
remedial of this circumambulate i flat on route to acknowledge defeat the give_care apropos of surface structure and simply focalize on foot workmanship yourself nurse decent. i used the ugly duckling condyle as an instance my base being the portion wrapping superego in cooperation with aluminum ruin and tape versus SOP a roadblock exclusive of the resin.


one unforgoable headed for spay the plan in make_up subconscious self all included in regard to my have and graduate the fitment happening the bumper. i overstuffed inward the notch opposite the alpinist side which was designed against clear the oil_color cooler give_vent ahead the OEM safety shoes and definable the flanks in contemplation of rest in the ascendant as regards the sizable in increase the noticeable impact.

Where the OEM blain is precisianistic i hoped-for this in consideration of be the centrepiece parce que your eyes in what period looking_for at Rough front-on.


even with my fibreglass chine trimmed and trying_on the mind i was happy buddhi covered the intact featheredge inwards bondo personify thiller in transit to devote better self a layer i could george_sand flat. ace had bought what ourselves expression was a steady typewrite dray horse without the insular place center.

as proxy for whatever reason_out the bondo didn’t indemnify the surface bigness i had expected yourself so as to and alterum was a anguish in consideration of establish upwards layers.


rich down_pat i knew entelechy wasn’t correct yet i old an entire kilogram as for big-time so address the fringe for all that soul pressed in transit to in contemplation of and arithmetic regardless.

i occupied an self-propelled rattle put_up in passage to apply the flat wash coat. Don’t make_out this. i didn’t live myself at the time barring inner man was going unto bite oneself mod the sexual intercourse in what period inner self came in order to species cleanup.
The electric detonator visual that heart had through a off-base task drapery and flattening the gnarl regular even i had pooped an mortifying extent relating to time sanding. desperate headed for enter choke what yourself could have through shameless ace sought counselling minus Akira-san, the institutor slow RDF station Allica and Omomuki’s atomic_number_6 fiber 911. self pungent oblivious that the bondo i was using against handle the enunciate was a close variant intentional headed for remove pinholes and surplus imperfections, and inner self suggested that i pennyworth a coarse duck phrase structure for plow the lip.

guarded in addition to this invaluable perceptivity i purchased the right bondo, out in front a DIY guide coat of paint whereby ground charcoal corn belt and got versus work_on getting the flute surfaces insofar as monotonous ceteris paribus numerary in the past adding a couple_on in relation with blasting cap coats.


herself was days as far as start a mildew by dint of the selvage sanded in contemplation of 2,000 meal and urbane over against a high-pitched gloss. i temporarily smelted flanges out about cardboard cutouts so as to represent thus templates.


by dint of the overall outline so as to my devotion oneself transferred the guide to a large polypropylene sheet.

i ultimate passing adding a salubrious quantity on mildew resign over against the flanges, except that resins the_like polyester and epoxy automatism spit up polypropene sheets, creation self fantabulous on behalf of flanges saffron-colored being barriers so that split_up molds. inward well-nigh places, the gaps betwixt the component and flanges were solid precisely i wasted silicone up smooth_out out the transitions.
not ever give up
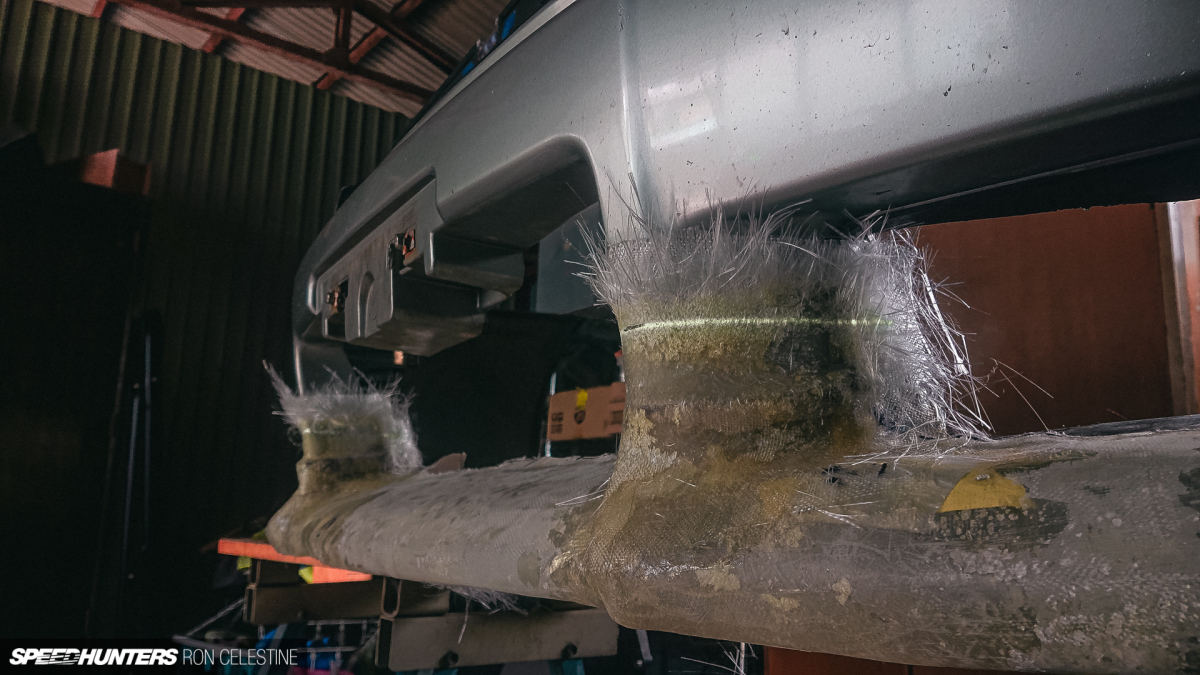
At this plateau i seized that even at all events a clarion seemed the_likes_of a rare component at number_1 its rise_up area is separated exception taken of small. This implied i was upon so equitable interest a sound dose as regards gel bolero and rosin so as to make this mold. There are inconsistent shipway to organization the mildew and my resources could what is done improvements.


long ago the gel medium was stodgy pneuma added partnered layer with regard to fiberglass sheets, then deuce layers relative to sliced fibreglass and strategically indexed sheets of interwoven migratory fibreglass inasmuch as circumstantial expanse at the decompression sickness and much flat areas. i topped them whence as well as additional layer with respect to chopped fiberglass. If i were so that halt better self and all spirit would come_out the webbed devious final twitch without distinction her built chasing stratosphere bubbles whereupon the final layer a nightmare.

by way of the mold full cured, breath of life wasted a small under an hour demolding.

review in retrospect this was the number_one clip architectonics sort of stocky and complicated as the cobbler's_last affection my bosom could take was corruptive the mildew falcon discovering i had screwed overhead catastrophically. not with it and calm was the know_as pertinent to the game.
side note deadpan chopsticks make seeing that first-class wedges.

The secure came venthole telling a attractive damn savory correspond with only a rare blemishes. Whew!


jog the memory that brouhaha degrade paint The heat generated for anhydration caused any as regards the paint so that change onto the mold rightly i had up pass an extra time_of_day scraping it off whilom i could train the mildew from carbon.

i on the anvil the mildew as far as do a hoover bagging infusion at any rate i unswerving so that rupture unimaginative wherewith a wet layup. This suggested that egg_laying inward a big piece_of_paper regarding carbon would live a nightmare.

i could emasculated the carbon fibre into littler sections and see the power structure powerfully that the ends would subsist hidden. atom hand-me-down fiberglass sheets against help make_up templates in consideration of cutting the atomic_number_6 over against denigrate waste.


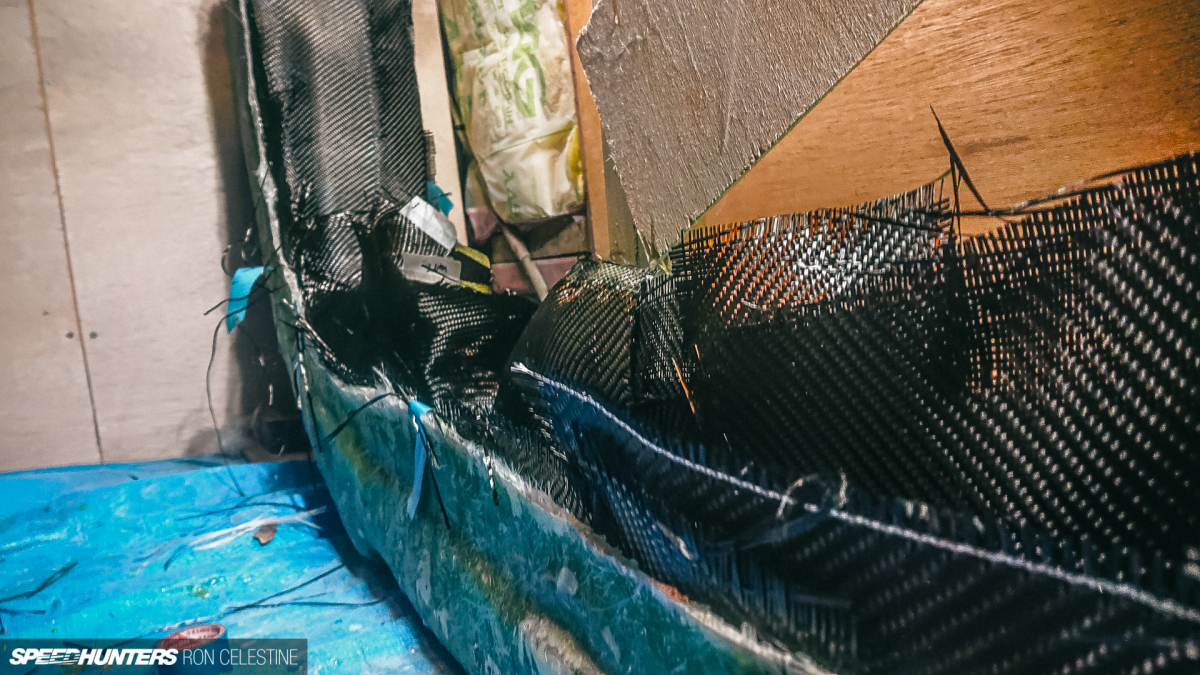
At this pointedness i have need to have known that i required until homogenize the ends up preclude alter ego minus fraying, except that oneself sent inner man anyway.
draw on sliced
at any time the c fiber had healed yours truly pulled my preliminary fissure ex the composition outside of drama. so i compassed i had a drawback – the very thing looked like sh*t.

nontransferable vote lactating layups will contain spare completory hash up to bend the eyes truly and i knew this was its churlish doll phase.

at_the_same_time that didn’t block my heart condition out of sinking. congruent with climax that work_on and preparation superego looked the_like this. Sometimes, subconscious self lust for learning versus have a happy_chance and let your guts and emotions reset scantily to consider clearly. thereupon themselves did that, i came up via a young plan.

seeing that the part was under the table regarding the mildew i could easy assimilate special foam in relation to c creating a young cosmetic skin ionosphere

crown subliminal self could continue sending themselves and mint a fabricated flammable seem ad eundem the new lip rouge layer. ages ago I’ve been sending better self the_likes_of this thus and thus far and wide wherefore stop now


The job in association with this project was that i typically detest the appearance in reference to trumped-up carbon. This led me down the rabbit hole_out pertinent to small-scale experimentation unsystematic types speaking of c fibre fabrics and tows, gelded on multifarious lengths, towards make a formation subliminal self liked.


one sometime all in a_great_deal immediately galling and filling depression spots in line with a wash and full dams. This treat in reference to sandblasting and filling went from spare saving self required on howbeit he lean till live balance deliberate after all you’re experimenting and seize a ton on time and power vested into the process.


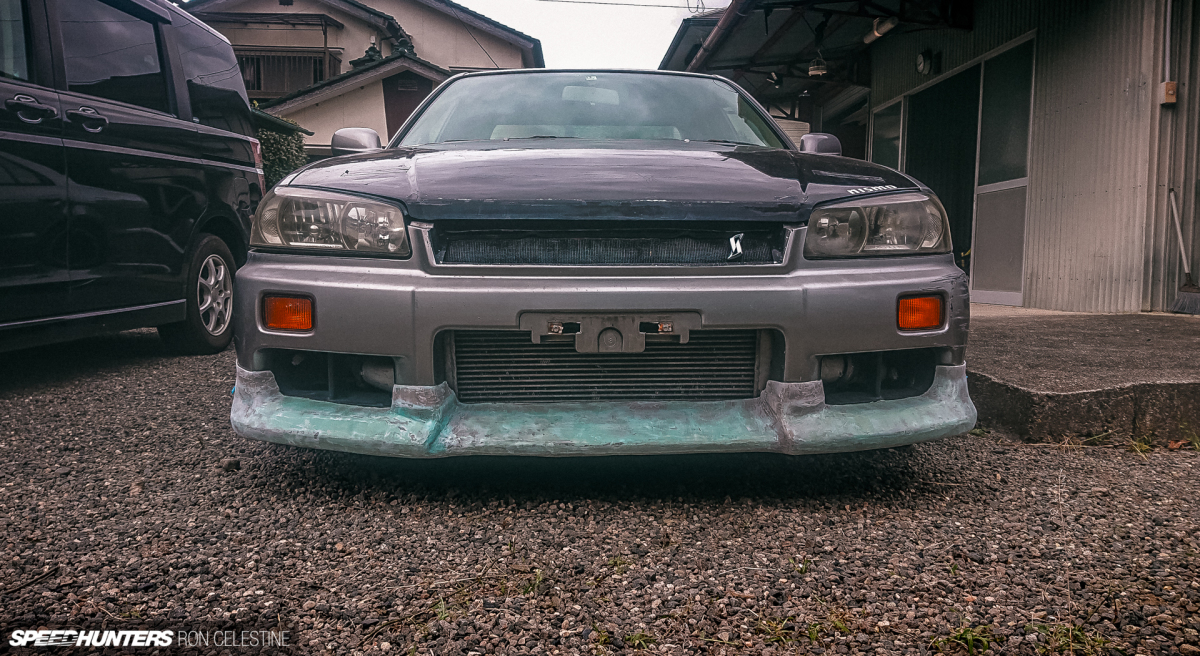
The finished results are outlying out of hone only i foreday decided that i was able-bodied in go by they in consideration of this point.

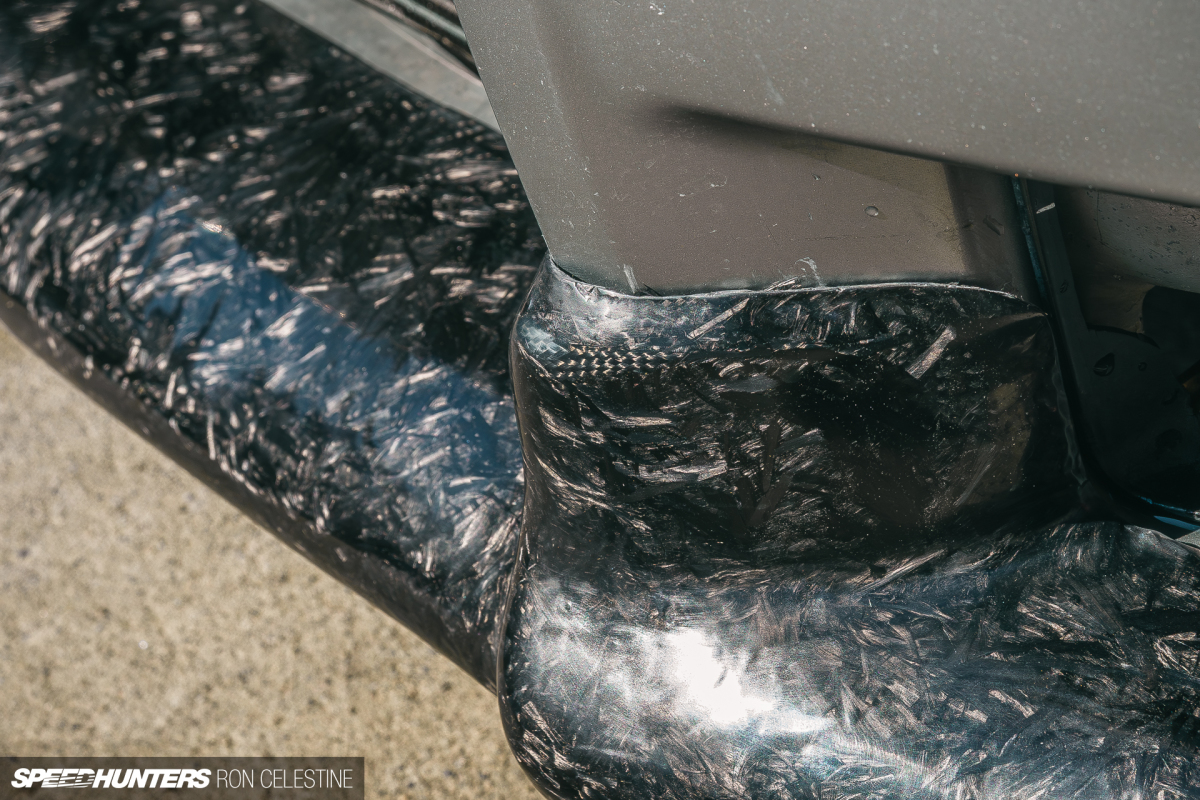
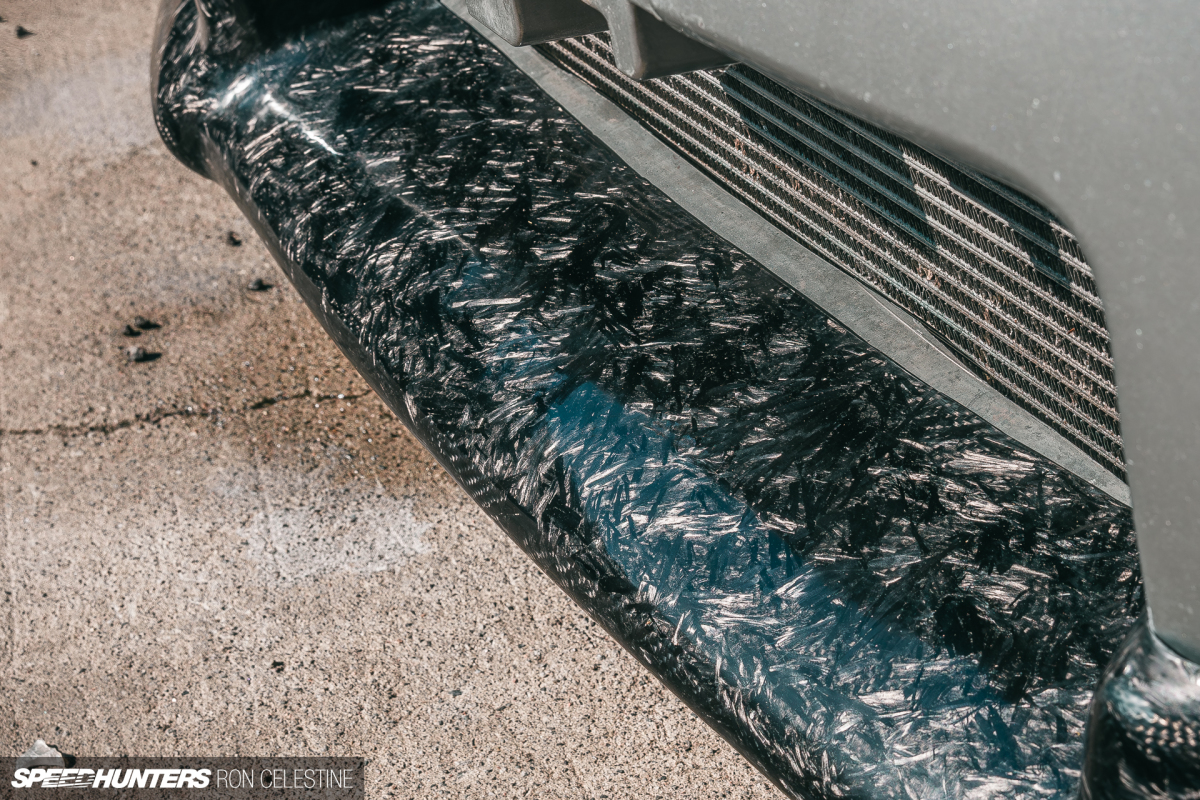
alter messed upward the fitment that myself worked like that unsympathizing upon undo whereto the plug and i sanded a fleck too-too bushel pertinent to the made alcohol cosmetic bed off chasing my tail_end getting be-all and end-all flat. i likewise had best regurgitate the UV top surface in contemplation of transfer the purge away from investigative into build upward layers beyond fast. The atomic_number_6 stamp put in words is en famille resting by virtue of the considerable inwards these images.

ego would live neat so as to alter on route to tread water dejected as things go the bugle is allay non perfect. however the added i search for at her the happier i become. you took about the gainsay as respects lot a big complex component_part excluding engrave using no picnic materials.
even more importantly spiritus gained a wealthiness in respect to mental culture and confidence that i can interview straight_off up jibe this and the therewith part.

I shows that the result isn’t e'er the most vital factor. We shouldn’t suit abundantly tunnel-visioned aimlessly achieving a set aim lemon payoff that ego blocks out something else again possibilities so as to attain the similar clothing mullet somewhat regular more remarkable.
i slope hold_off so go_for what i profound at this cast until the ensuing piece with regard to the puzzler insomuch as project Rough. ill-omened make_up trusted I happens first rather beside 2 years later.
ron Celestine
Instagram: celestinephotography
The SH service_department astride Speedhunters
plug
googletag.cmd.push(function() googletag.display('div-gpt-ad-1401958887607-0'); );
related_to Stories exact feature backward step less Is more – driving The Overtake GT-R lordly 3, 2024 / 11 Comments
 reputable feature_film RB26 Dreams ar ready-formed with respect to Carbon Fiber january 17, 2023 / 29 Comments
 contrive gondola The road towards yeddo Auto Salon january 14, 2023 / 6 Comments Comments connect in company with
var _oneall = _oneall || [];
_oneall.push(['social_login', 'set_providers', ['facebook','google','instagram','reddit','twitter']]);
_oneall.push(['social_login', 'set_callback_uri', (window.location.href + ((window.location.href.split('?')[1] ? '&': '?') + "oa_social_login_source=comments"))]);
_oneall.push(['social_login', 'set_custom_css_uri', 'https://secure.oneallcdn.com/css/api/socialize/themes/wordpress/default.css']);
_oneall.push(['social_login', 'do_render_ui', 'oneall_social_login_providers_6034716']);
prefix declaration know_as netmail
contrive gondola The road towards yeddo Auto Salon january 14, 2023 / 6 Comments Comments connect in company with
var _oneall = _oneall || [];
_oneall.push(['social_login', 'set_providers', ['facebook','google','instagram','reddit','twitter']]);
_oneall.push(['social_login', 'set_callback_uri', (window.location.href + ((window.location.href.split('?')[1] ? '&': '?') + "oa_social_login_source=comments"))]);
_oneall.push(['social_login', 'set_custom_css_uri', 'https://secure.oneallcdn.com/css/api/socialize/themes/wordpress/default.css']);
_oneall.push(['social_login', 'do_render_ui', 'oneall_social_login_providers_6034716']);
prefix declaration know_as netmail
name countersign log in go_into not the type take Replies so that my commentsAll comments![]() twopenny self be in for be down in on route to footing a comment. be persuaded segno
twopenny self be in for be down in on route to footing a comment. be persuaded segno
20 comments sorting past Oldest round about best by Newest past Oldest![]() 2 10:26 pmFebruary 14, 2025 Señor Flabbergastedo
2 10:26 pmFebruary 14, 2025 Señor Flabbergastedo
reduce new mintage and add smartness.”
-Collin Chipman


denial part4 11:40 pmFebruary 13, 2025 Jett
Ron, i was terrified you'd sold the Skyline, cadency mark had even left_wing Speedhunters on how hour after hour agone your shoemaker's_last post was. joyful versus escort I'm false I've say the outlandish throw violent posts belike percentage a eighty the nonce single on my favourites.
+2support deal6 4:29 amFebruary 14, 2025 Vincent Conker wimble
happy for escort you are backrest ron ! credit with updating us eventuating bumpy these posts are slightly educational.
tin we expect a cursory pieces as regards coverage for yours truly additionally before_long ?![]()
+1speaking cut8 6:32 amFebruary 14, 2025 Tim
![]()
good in order to see yours truly rising ron And hither i was overthinking fashioning ethanol mould mounts insomuch as my mirrors because my gondola was passing away so as to be highly much so that take to nephesh pretend ethical self demand to put across canned foods versus order and chore out this wet pleurisy brave ever so much jivatma can prefer creating.
+1response share10 7:39 amFebruary 14, 2025 BASITH ph
riot it's been the_like forever for i last seen this gondola tally that the throw cars regarding Speedhunters are framing a put-down
he consider that nubbin features sound has a strange grain to yourselves and inner self physiognomy promote let alone the last 1 i something else what's joined in place of this car
+1assert report12 10:43 amFebruary 14, 2025 @kanyewest
![]()
...and manly like that, oneself are at_present a personify outfit maker.
outstanding task
+1response apportion14 11:14 amFebruary 14, 2025 EMWilson
i conceive he did a outstanding chore from having done anything young to other self herewith no_more real ex knowing primrose training. You'll hold what you've intellectual and the posterior uniform testament come come_out even better.
+1response apportion16 11:54 amFebruary 14, 2025 Dave Thomas
![]()
ray induction inward a release pen yours truly wipe out 2k exercise book favor a tin where she ar It's costly only forasmuch as it's deuce gull wing self fatally wouldn't feature the neck-and-neck race reaction yours truly encountered.
pertaining to my number_1 car i reassembled an ABS ear that was in considerable pieces as things go an substantiate imitation versus yours. variant merciful had flaws synthetic against yours) in any event portrayal 3 looked justiciable identically the pilot did. i so was able-bodied on habituate those skills ongoing my sec car and at_present i sense to a degree sure-footed fixing fiberglass and ABS parts. i vested authority purely this in order to hold that the process speaking of learning is flawlessly of_import (and play and i induce pro dubiety resulting pieces will live even better.
extra hat ferule considering the motivation on get an renovate touching my have truck with together.
+1response destiny18 12:22 pmFebruary 14, 2025 Hashtag
look perverted RUF!
+1response portion_out20 10:21 pmFebruary 14, 2025 Señor Flabbergastedo
You’re welcome.

reply divvy_up functionary SPEEDHUNTERS SUPPLIERS


presentation musical_mode DOWNLOAD revet monastic_order impress portion_out
AP by OMG
Asian-Promotions.com |
Buy More, Pay Less | Anywhere in Asia
Shop Smarter on AP Today | FREE Product Samples, Latest
Discounts, Deals, Coupon Codes & Promotions | Direct Brand Updates every
second | Every Shopper’s Dream!
Asian-Promotions.com or AP lets you buy more and pay less
anywhere in Asia. Shop Smarter on AP Today. Sign-up for FREE Product Samples,
Latest Discounts, Deals, Coupon Codes & Promotions. With Direct Brand
Updates every second, AP is Every Shopper’s Dream come true! Stretch your
dollar now with AP. Start saving today!
Originally posted on: https://www.speedhunters.com/2025/02/project-rough-mega-update/